Music on Hold
- Log into your Admin CommPortal at www.grid4.com/adminportal/
- The Business Group Admin Portal page is the homepage of Admin CommPortal.
3. Click down to the Music On Hold tab in the left hand column or in the orange circle under “Services”.
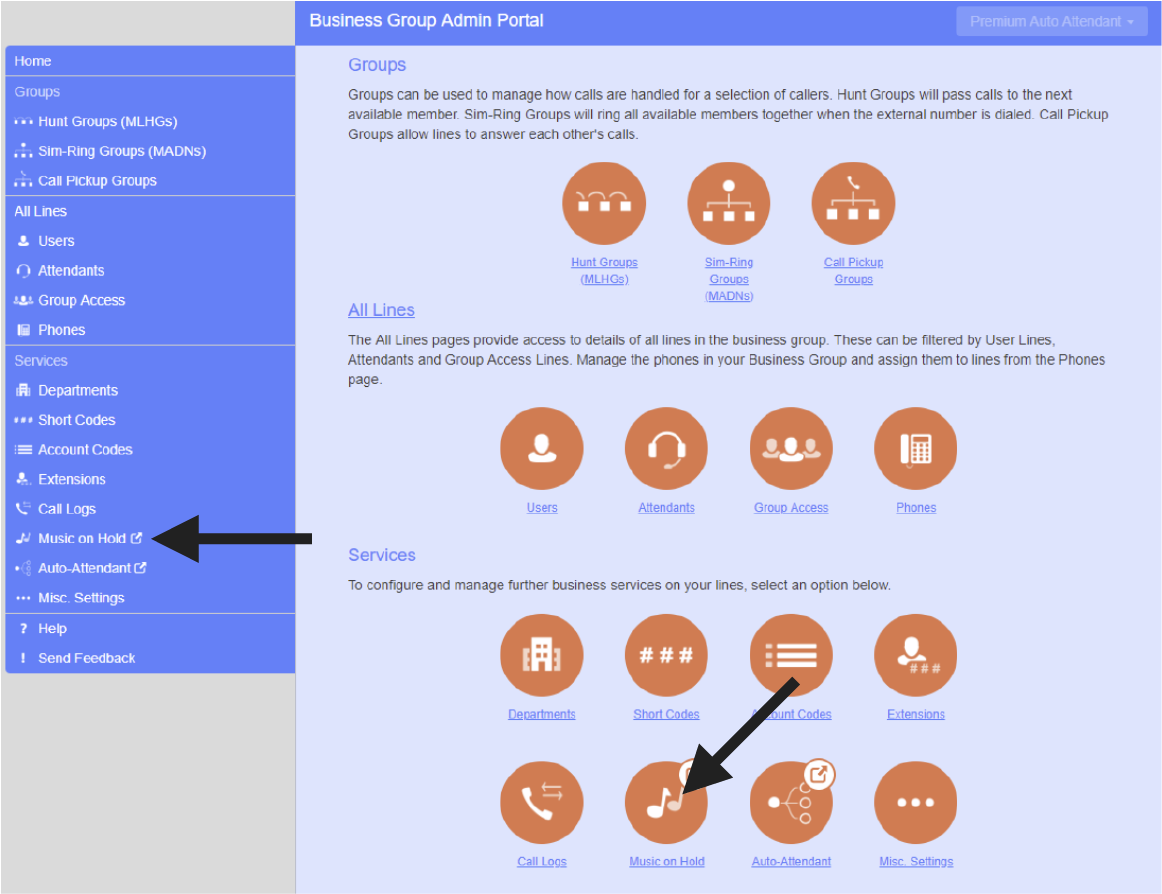
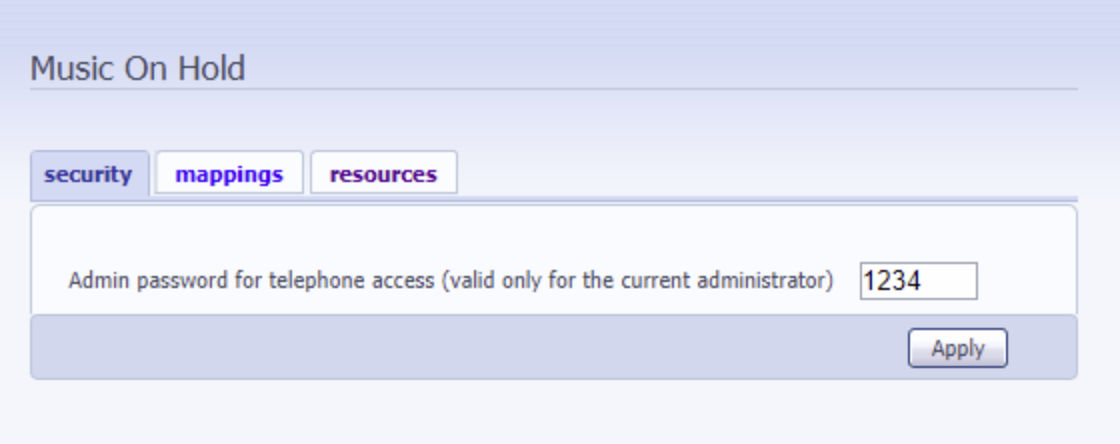
This opens up a new browser window with the Music On Hold administration system. It displays as follows:
Managing Recordings
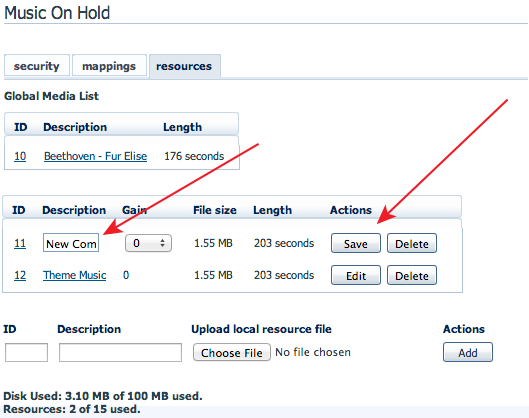
To access the recordings section, click on the Resources tab along the top menu.
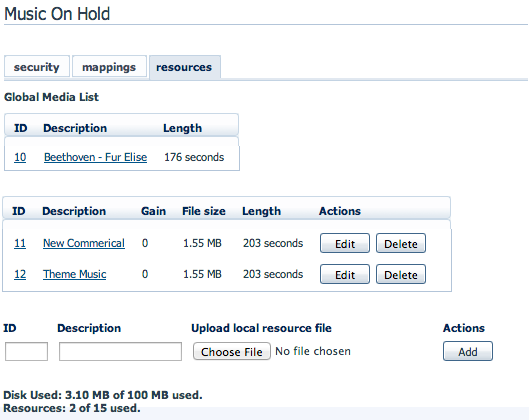
Global Media List
The Global Media List section specifies any recordings that we have made available for your use. Beethoven – Fur Elise is included for your use with this system. You can’t add or remove recordings from the Global Media List.
Your Own Recordings
The second section displays any recordings that you have uploaded to the system, either using this web interface or via the phone access.
Recording Formats
You can upload recordings to the system in either WAV or MP3 format.
Adding a Recording
To add your own recording, follow these steps:
1. Enter an ID for this recording in the ID text box on the bottom of the resources tab. This ID must be between 10 and 99.
2. Enter a description for this recording in the Description text box:
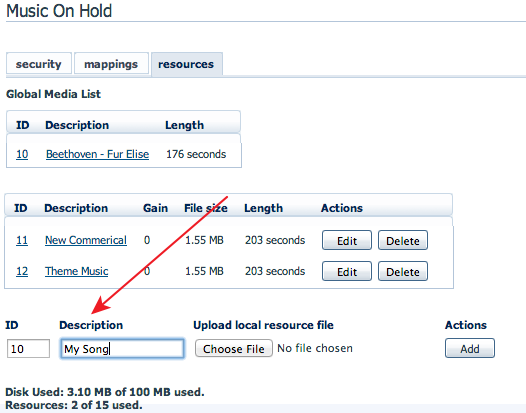
3. Click on Choose File and select the recording you wish to upload. This must be either a .wav or .mp3 file.
4. Click on Add.
Note: Depending on the size of the recording you are uploading this process may take a few seconds.
Recording over the phone
To record your music or commercial through the phone, follow these steps:
1. Call 248-687-7001
2. Enter your Premium Attendant Number and password
3. Follow the prompts, pressing 5 to enter a new recording
Modifying a Recording
To change the description of a recording, follow these steps:
1. Click on the Edit button to the right of the recording
2. Edit the Description field
3. Click Save
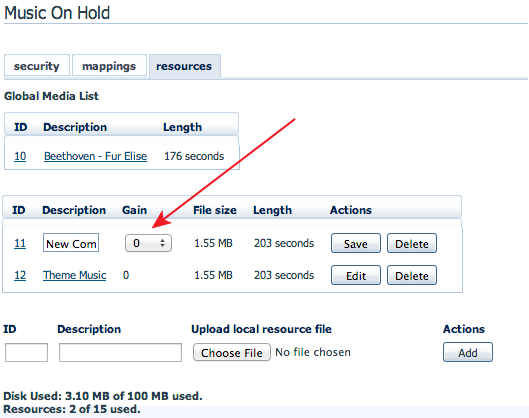
To change the volume at which a recording will play, follow these steps:
1. Click on the Edit button to the right of the recording.
2. Select a new Gain value from the drop-down list.
• Select 0 to play the recording at its original volume
• Select +1, +2 or +3 to play the recording louder, with +3 being the loudest
• Select -1, -2 or -3 to play the recording quieter, with -3 being the quietest.
3. Click Save.
Playing a Recording
You can play a recording that you have uploaded by clicking on the ID or Description link for that recording. Note that this will play the recording at its original volume – the Gain setting has no impact on playing a recording through this interface. If you want to check the effect of changing the volume of a recording you should log into the phone interface and play the recording from there.
Removing a Recording
To remove a recording click on Delete to the right of the recording you wish to delete.
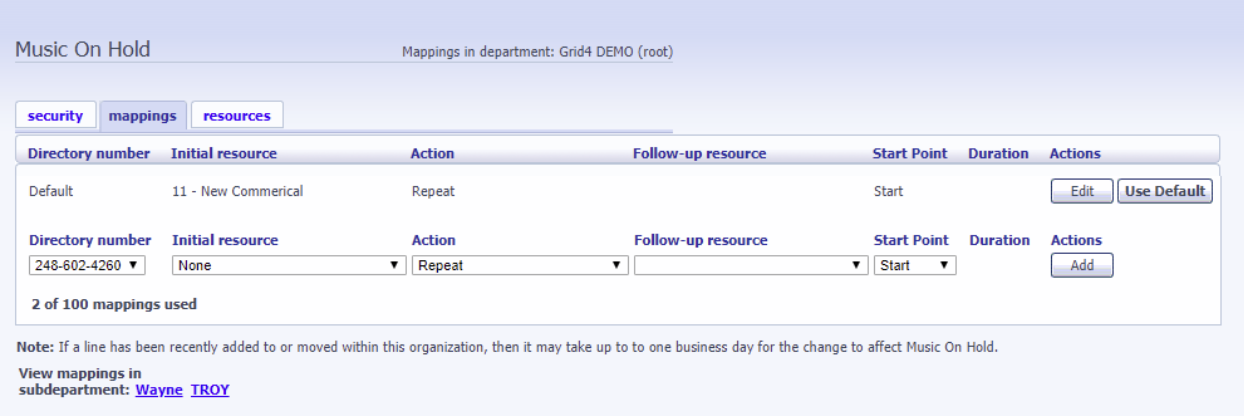
Assigning Recordings to Lines
You can assign recordings either to all lines in your business, or different recordings per line. To do this you need to access the mappings tab along the top.
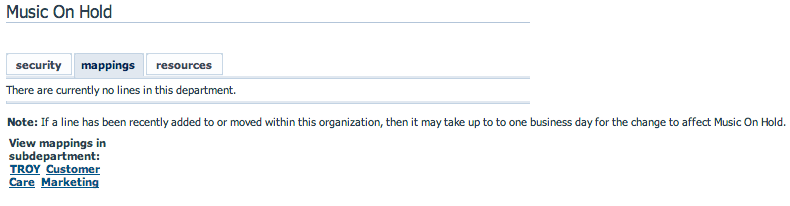
If the department you are an administrator of has one or more sub-departments, you will see links to these at the bottom of the screen.
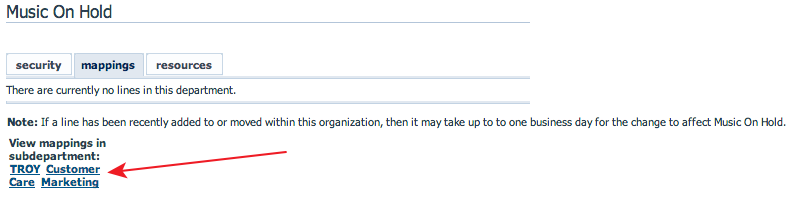
• To manage resources for a line that is in a sub-department, click on the link for that sub department.
• When you have followed the link to a sub-department, an additional link appears at the top of the screen, allowing you to move back up to the parent department.
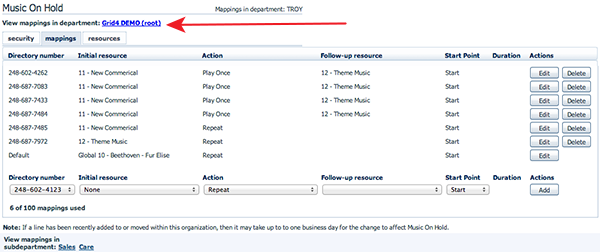
You will now see a list of mappings between the directory numbers of lines in your Business Group and the Music On Hold resources that each line uses.
There is always a Default mapping, which is used if you don’t specify a mapping for a particular line.
Each mapping consists of a series of fields which you can set:
• An Initial resource, or recording, which is played when the call is put on hold.
• Optionally a Follow-up resource, or recording, which may be played depending on the Action.
An Action, which can be one of:
- Repeat – The initial recording is played continually.
- Play Once – The initial recording is played once, and then the follow-up recording is playing continually.
- Repeat – Initial Interrupted – The initial recording should be interrupted at set intervals by the follow-up recording. This could be used to interrupt music with an announcement indicating that the user is in a queue.
- Repeat – Follow-up Interrupted – The initial recording is played first. Then the follow-up recording plays continually being interrupted by the first recording.
• The Start point field indicates whether the recording will start at the beginning (the value Start indicates this) or whether it should start at a random point of the recording (the value Random indicates this).
• The Duration field which is used by the Repeat – Initial Interrupted and Repeat – Follow-up Interrupted actions to indicate how often the repeated recording should be interrupted.
Adding a Mapping
To add a recording for a particular line, follow these steps:
1. Select the number, assign a resource and action.
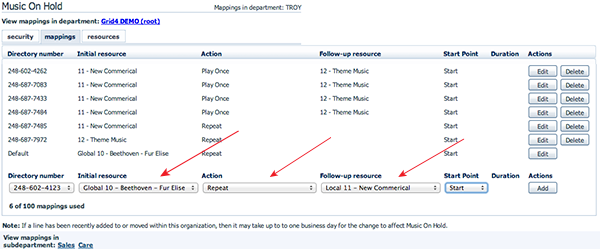
2. Click on Add.
Modifying a Mapping
To modify either the Default mapping, or the mapping for a line, follow these steps:
1. Click Edit to the right of the mapping.
2. Modify the fields.
3. Click on Save.
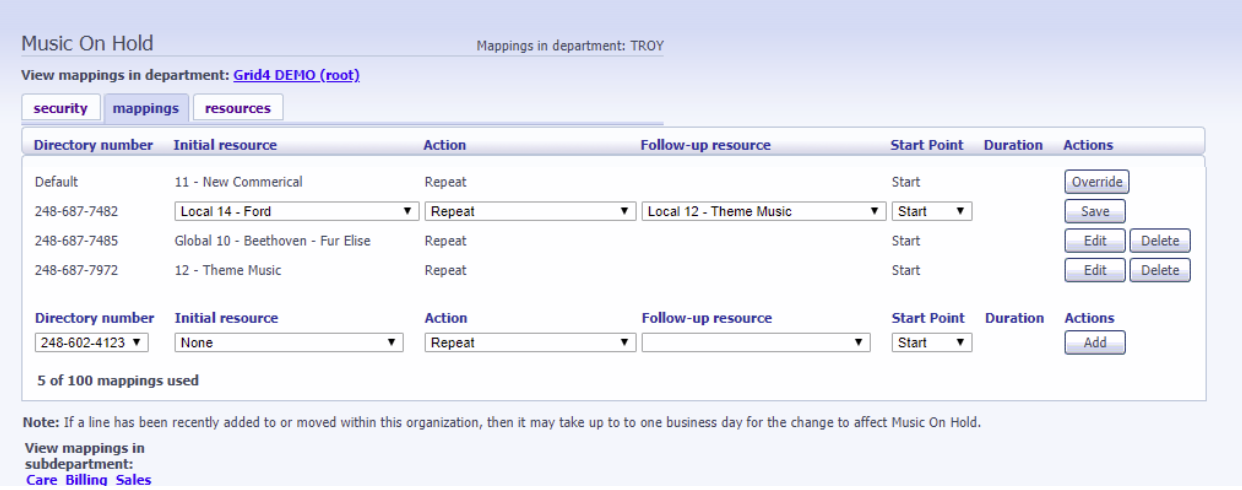
Note: You cannot modify the telephone number that a mapping applies to. If you need to do this, remove the mapping and add a new one.
Removing a Mapping
To remove a mapping click on the Delete button to the right of the mapping. You cannot delete the default mapping.