Holiday Announcements
Setting up & Using Holiday Announcements
A “Holiday” announcement can be recorded in advance of any holiday and applied when needed. Many businesses use the same prompts as their “After Hours” prompts for holiday announcements.
*** It is recommended that a script be written for each announcement. ***
-
- Go to www.grid4.com/adminportal
- Log into the Admin CommPortal using your Admin number and password.
- Go to the Auto Attendant line and open the Premium Attendant.
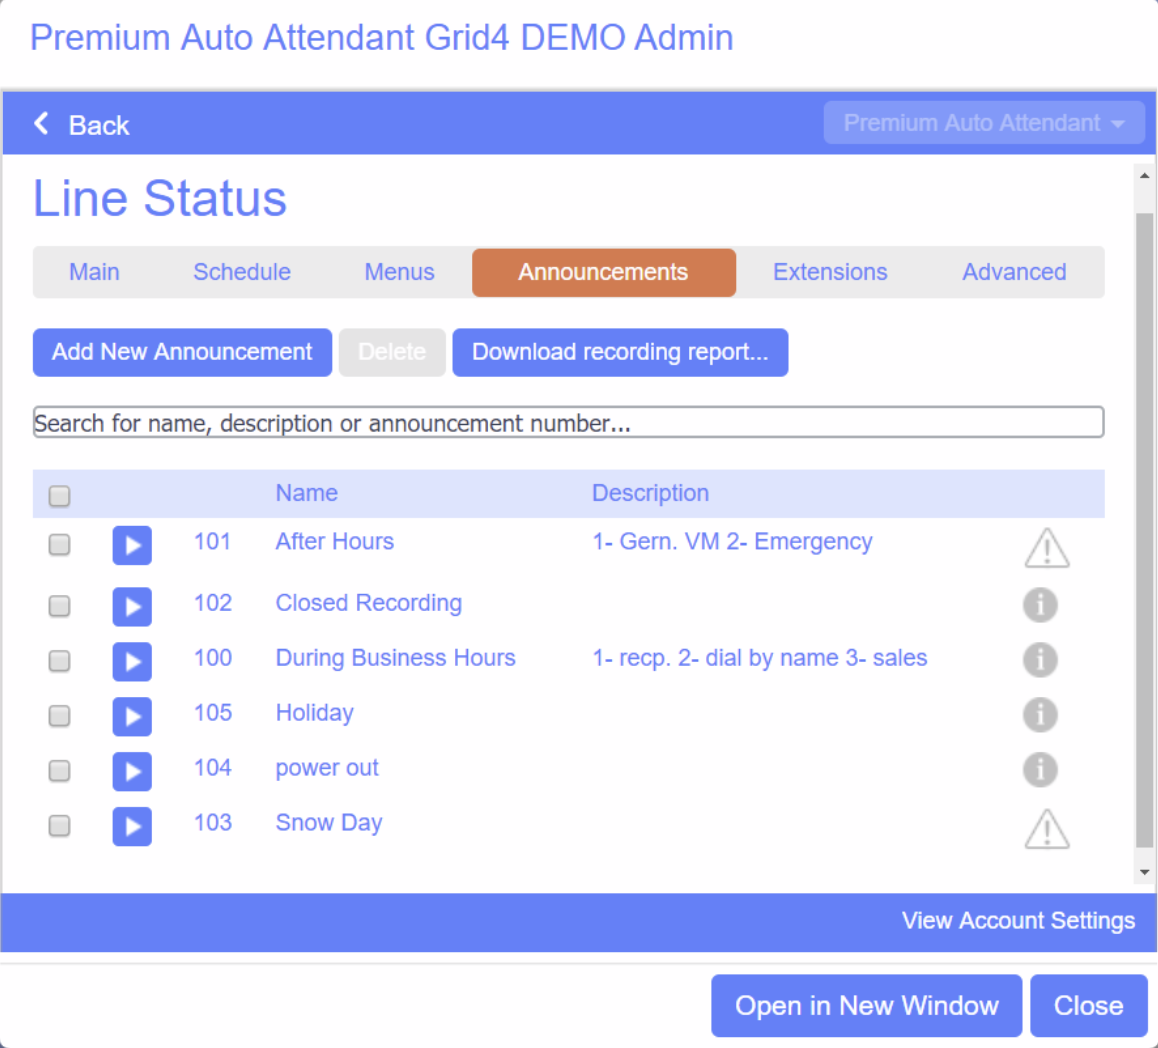
- Go to “Announcements” and then “Add New Announcement”.
- Name it “Holiday”, “Thanksgiving”, etc.
- Click apply to save the changes.
- Do this for every new announcement.
The system will generate a new 3 digit announcement number that you will reference when you call in to record it.
Recording a New Announcement
- Dial 248.556.7000 from any phone. Mobile phones have excellent audio quality for recording.
** Note: If you are recording an announcement from your desk phone
Press your voicemail key and listen for the prompt “to leave this mailbox and to log in as another subscriber press 7”. **
-
- The account number is your Premium Attendant number followed by the pound sign.
- Enter your PIN followed by the pound sign.
- Choose option 1, “change the Premium Attendant configuration.”
- Choose “edit your announcements,” press 2.
- Enter the 3 digit announcement number that corresponds to the announcement you’re going to record.
- Follow prompts to record & save your recording.
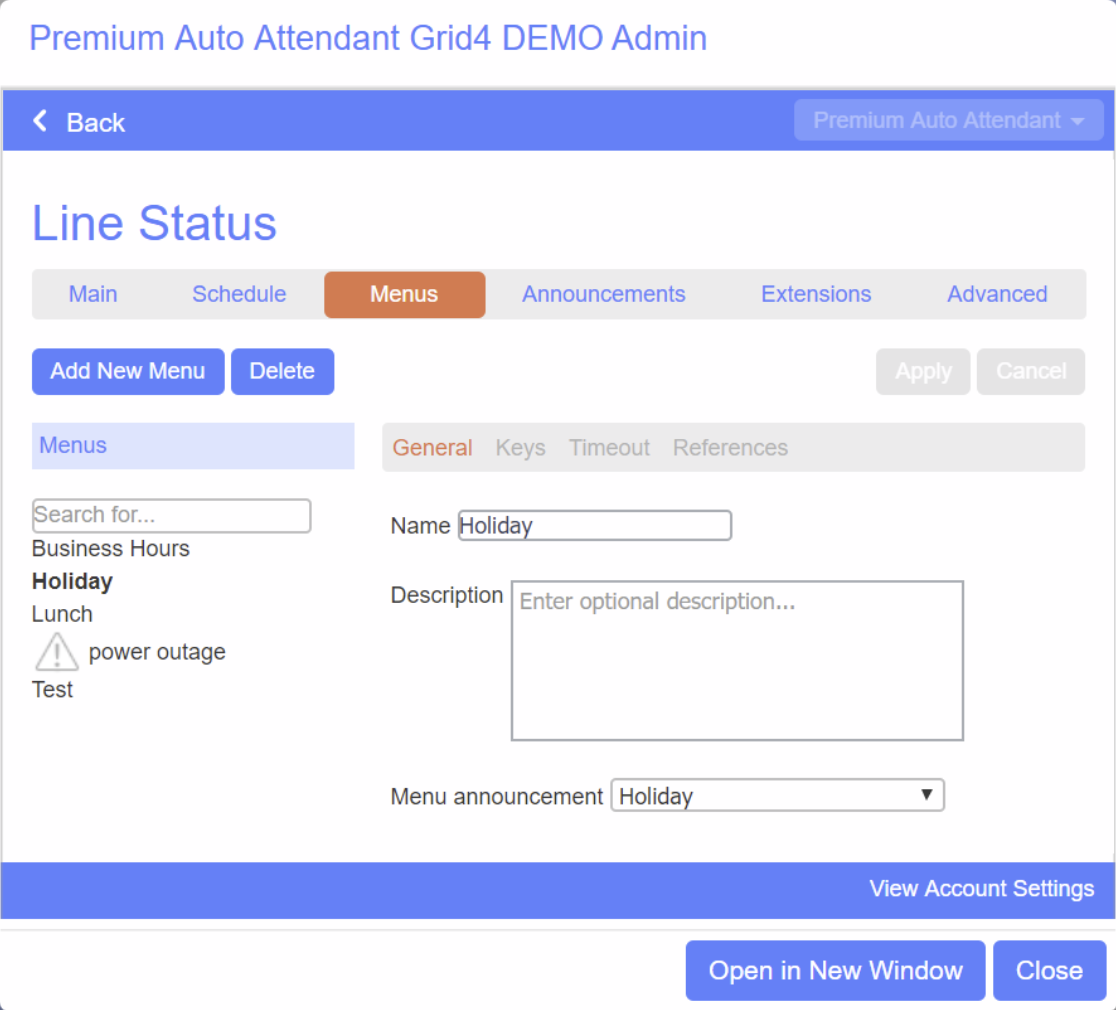
Set up a Holiday Menu
-
- Go the “Menu” tab and “Add New Menu” with the same name as the announcement.
- Make sure to use your new “Holiday” announcement for that menu.
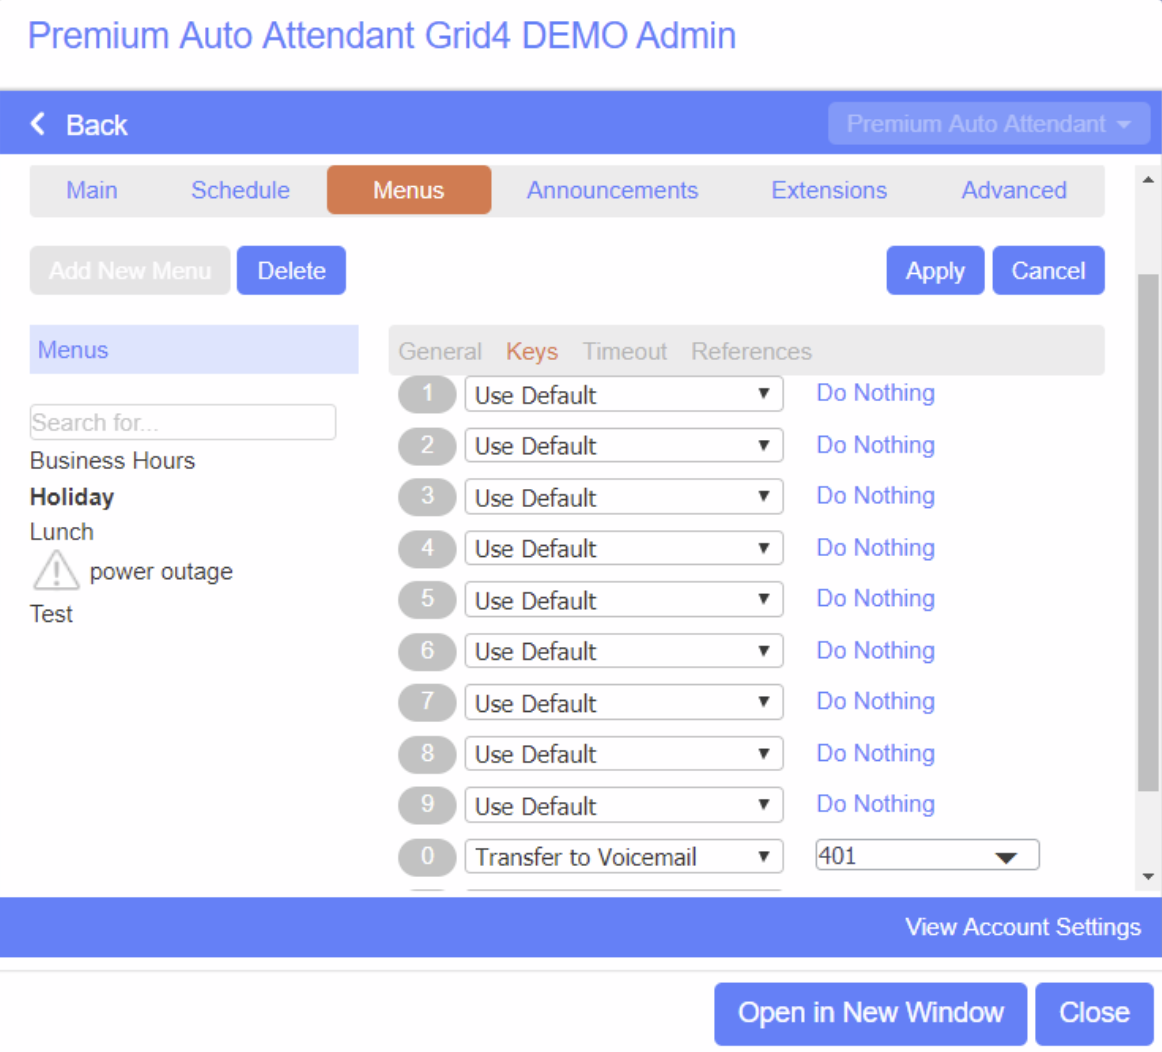
- Program the menu keys to correspond with your announcement.
- Click “Apply” to save the changes.
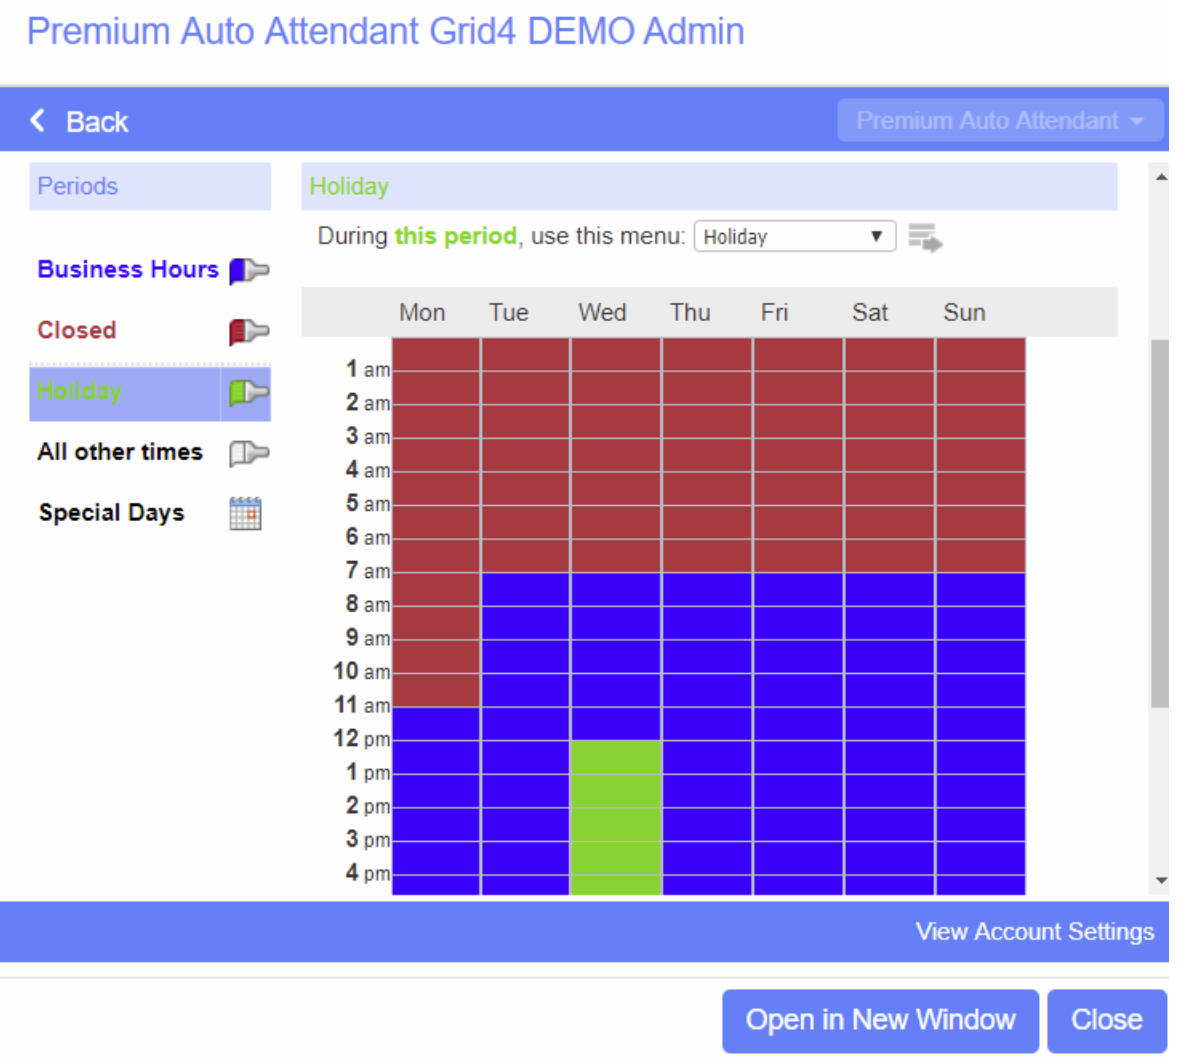
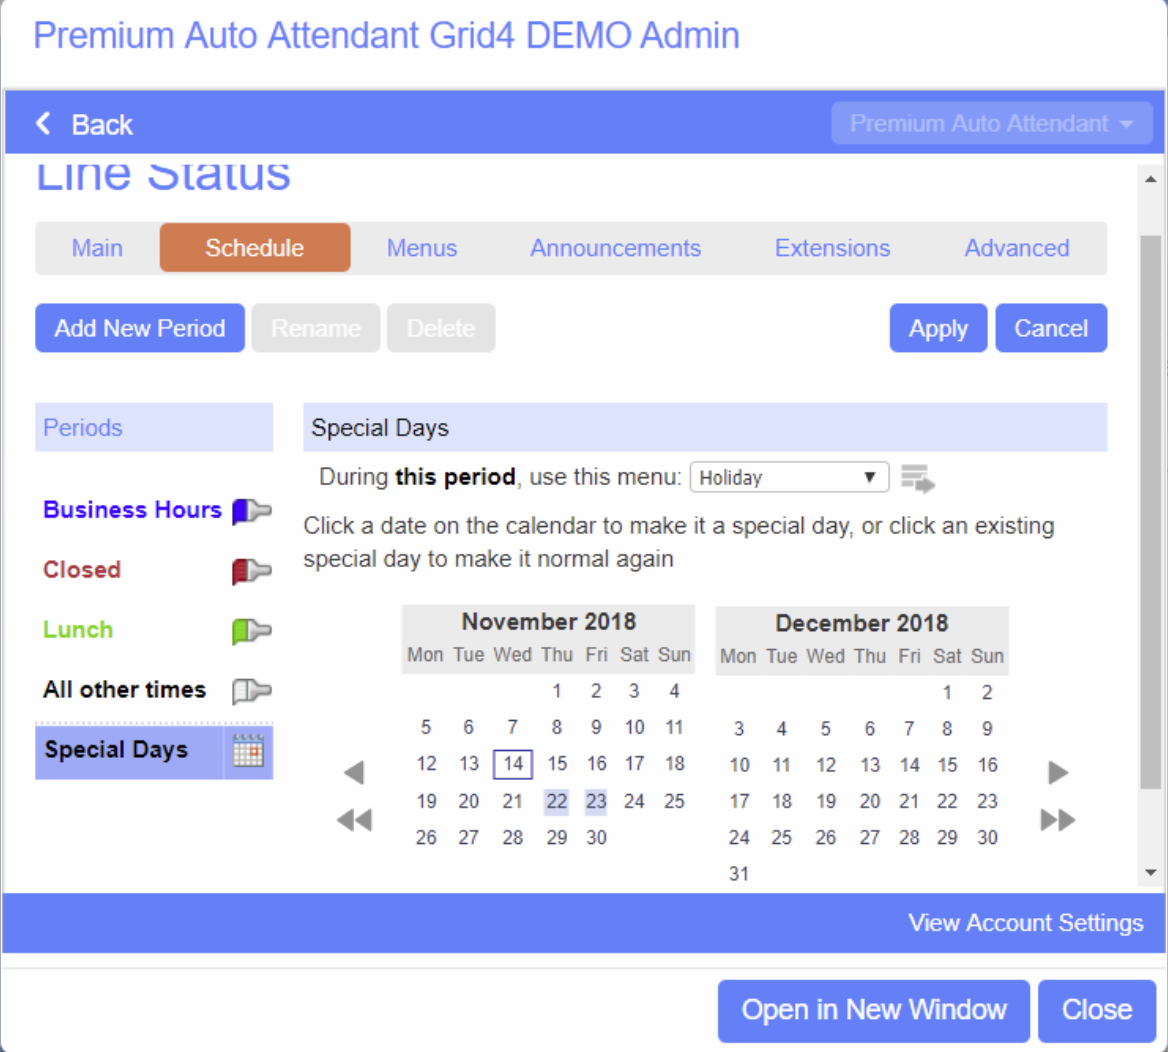
Holiday Schedule
To apply the holiday announcement, use the “Special Day” time period in the “Schedule” tab.
-
- Go to the “Menu” dropdown at the top of the schedule and choose the “Holiday” menu.
- Click on the calendar day that you want your “Holiday” announcement and menu to play
- Click “Apply” to save the changes.
This will override the normal schedule for the days that are highlighted. It will go back to the normal schedule on the next non-highlighted day. You may select all the days you want to follow the Holiday schedule by using the arrows to the right of the calendar.
PLEASE NOTE: The week begins with Monday for these calendars.
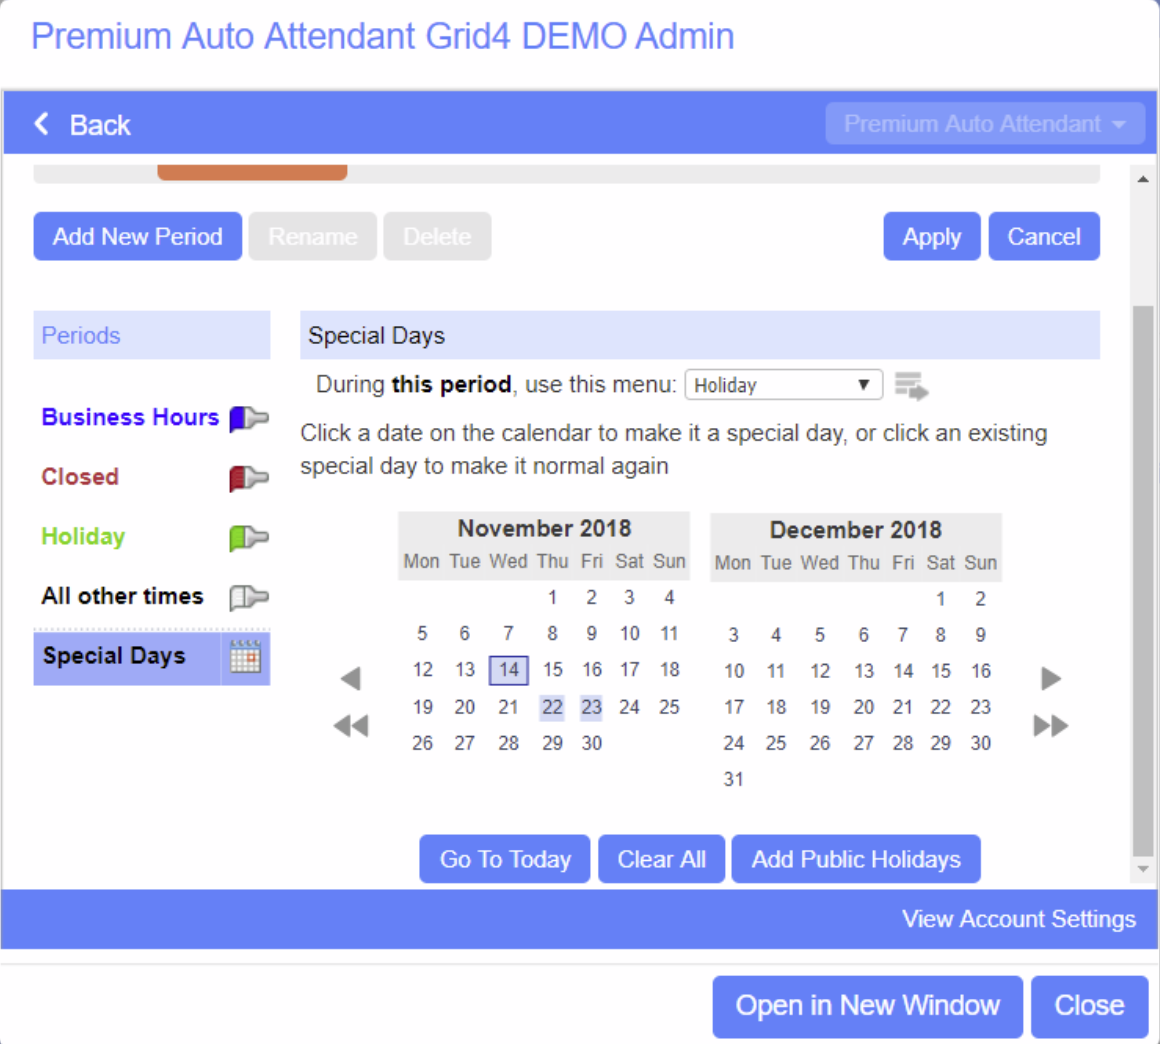
Half Days or Leaving Early – Option 1
For 1/2 days or days that you close early you can set a custom recording the same way.
-
- Log into the Premium Attendant line.
- Go to the “Schedule” tab and choose “Special Days”.
- Click on “Go To Today” and the “Holiday” menu and announcement will be immediately applied.
The schedule will go back to normal on the next non-highlighted day. You will not have to remove the holiday announcement.
Half Days or Leaving Early – Option 2
For 1/2 days or days that you close early you can set a Holiday schedule by coloring the grid in the regular schedule.
-
- Log into the Premium Attendant line.
- Create a Holiday time period.
- Apply the Holiday Menu to the Holiday time period.
- Color the grid in the appropriate day and hours that you will be closed.
PLEASE NOTE: This is the weekly schedule. You will need to change it back to the normal schedule before the same day in the following week or the Holiday schedule will still be in effect.