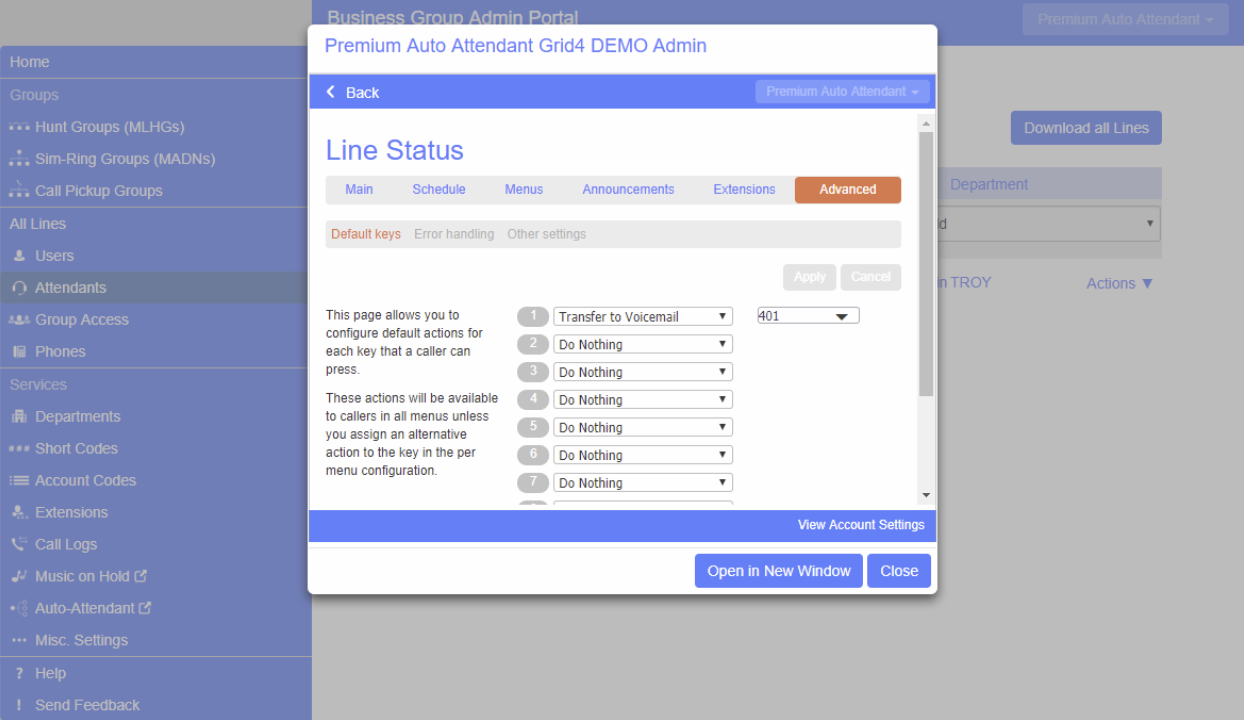
In order to configure the advanced setting for your Premium Attendant, click on the Advanced tab and define the default handling for each key press. These actions will be available to callers in all menusunless you assign an alternative action to the key in the per menu configuration.
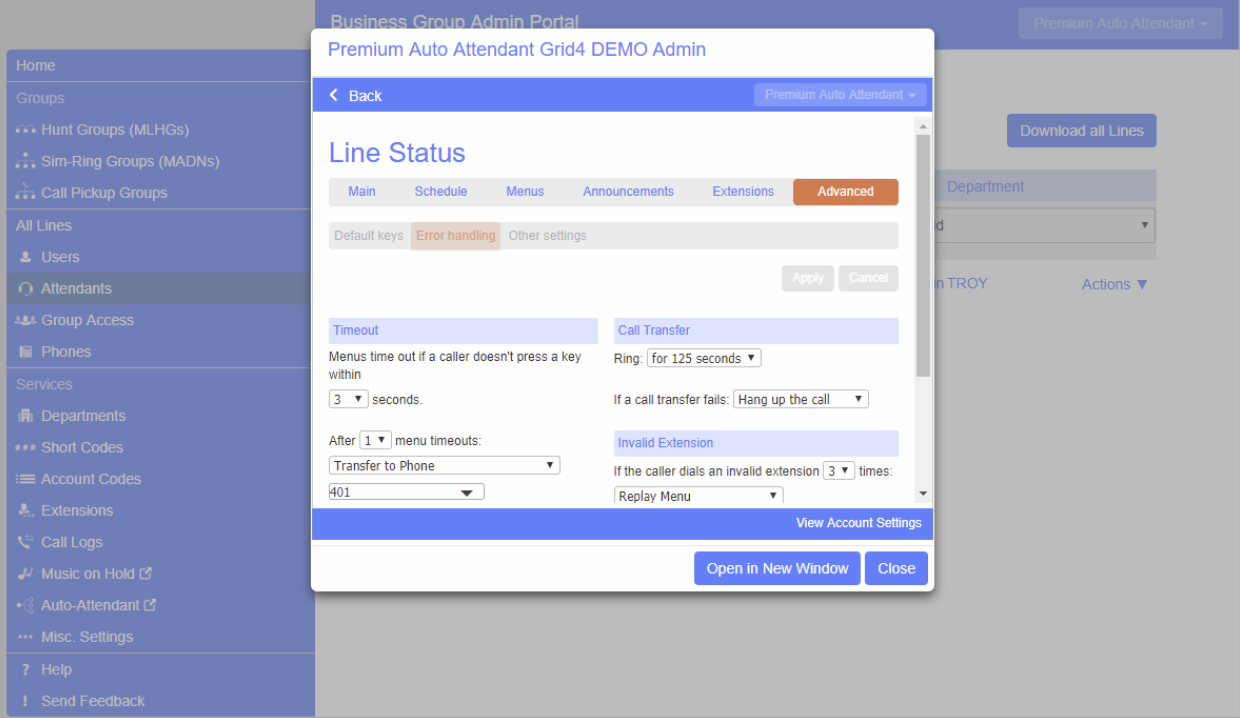
Next click on the Error Handling link and set the value and behavior for Timeout, Call Transfers, Unknown Input and Invalid Extensions. If these are set, they will automatically apply to all menus. You may skip this set if you would like the menus to differ.
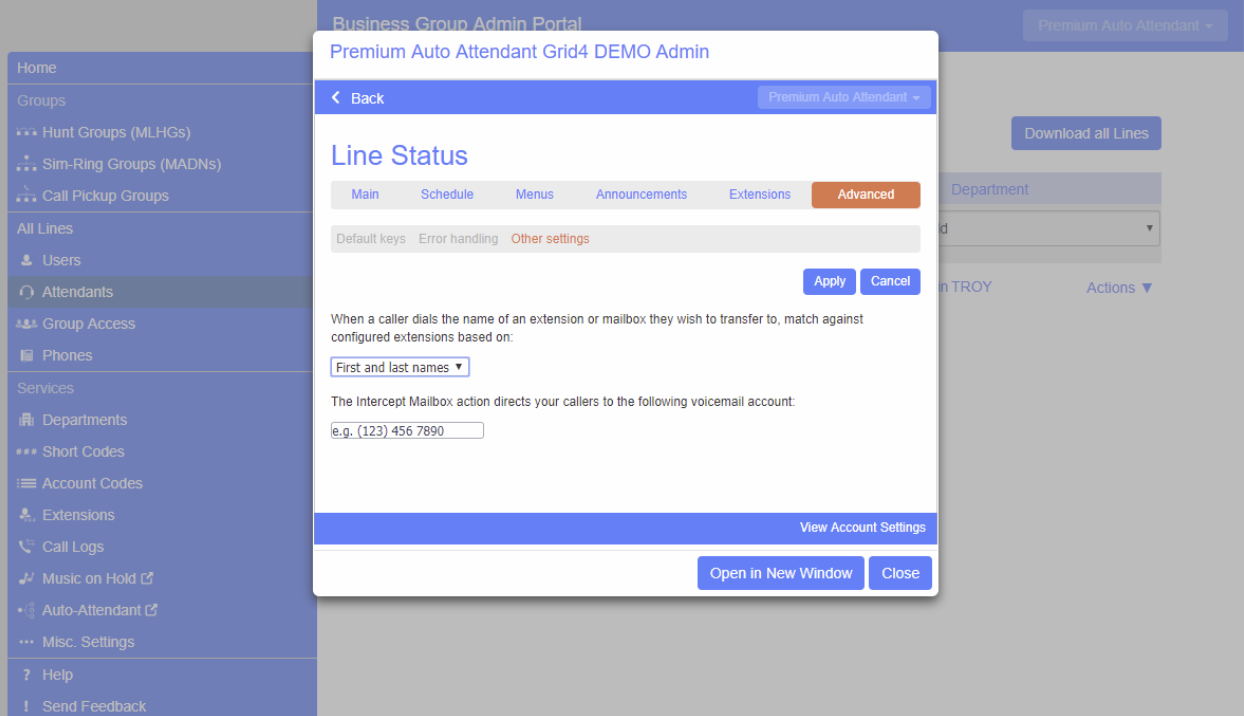
“Other Settings” allow you to select “Dial By Name” or “Voicemail by Name” options as “First and Last Names”, “First Names” or “Last Names”.
You may also choose an “Intercept Mailbox”. It must be a Voicemail in your Grid4 Business Group.
A “Holiday” announcement can be recorded in advance of any holiday and applied when needed. Many businesses use the same prompts as their “After Hours” prompts for holiday announcements.
*** It is recommended that a script be written for each announcement. ***
Go to www.grid4.com/adminportal
Log into the Admin CommPortal using your Admin number and password.
Go to the Auto Attendant line and open the Premium Attendant.
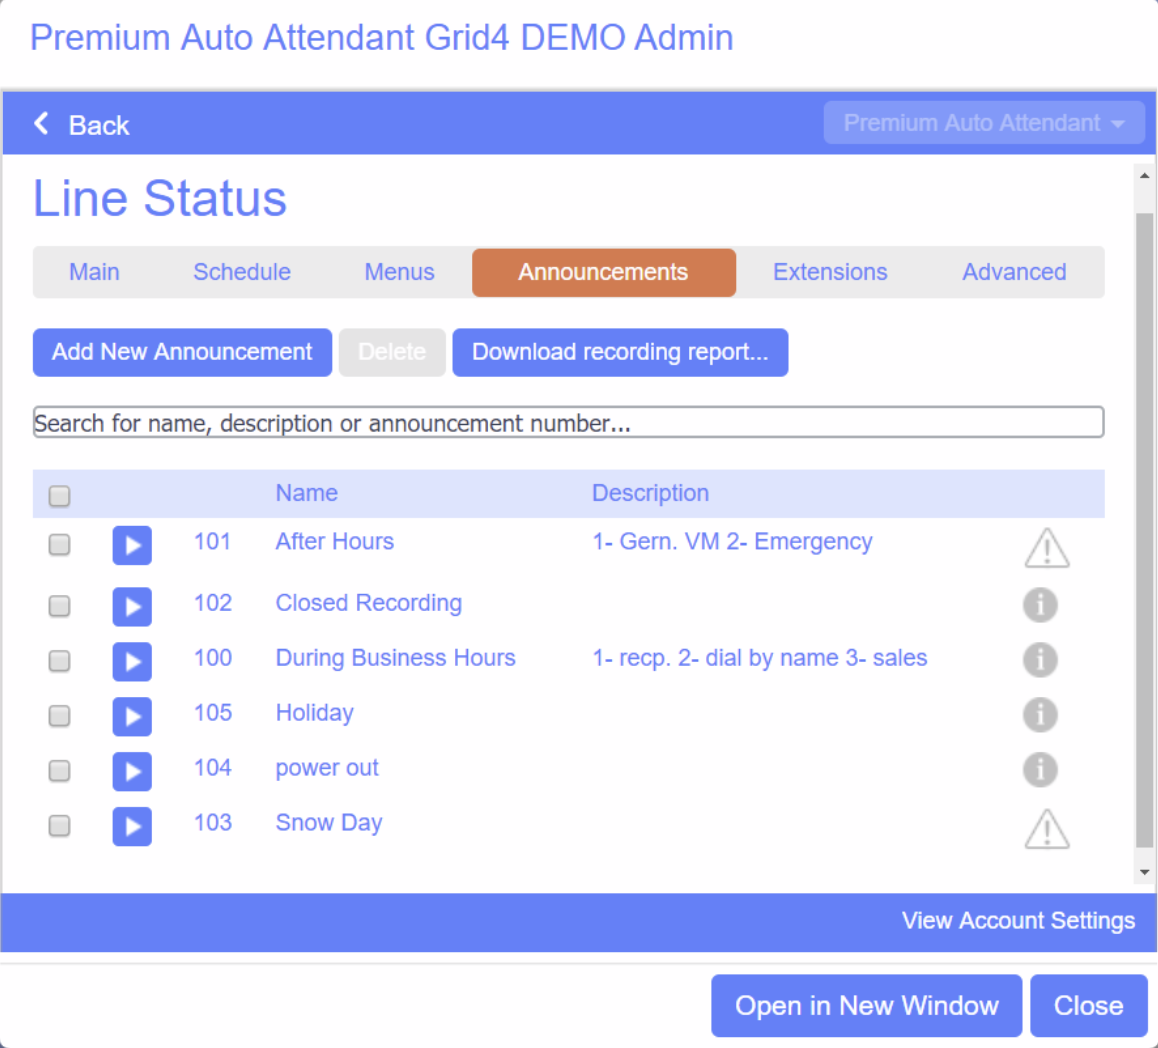
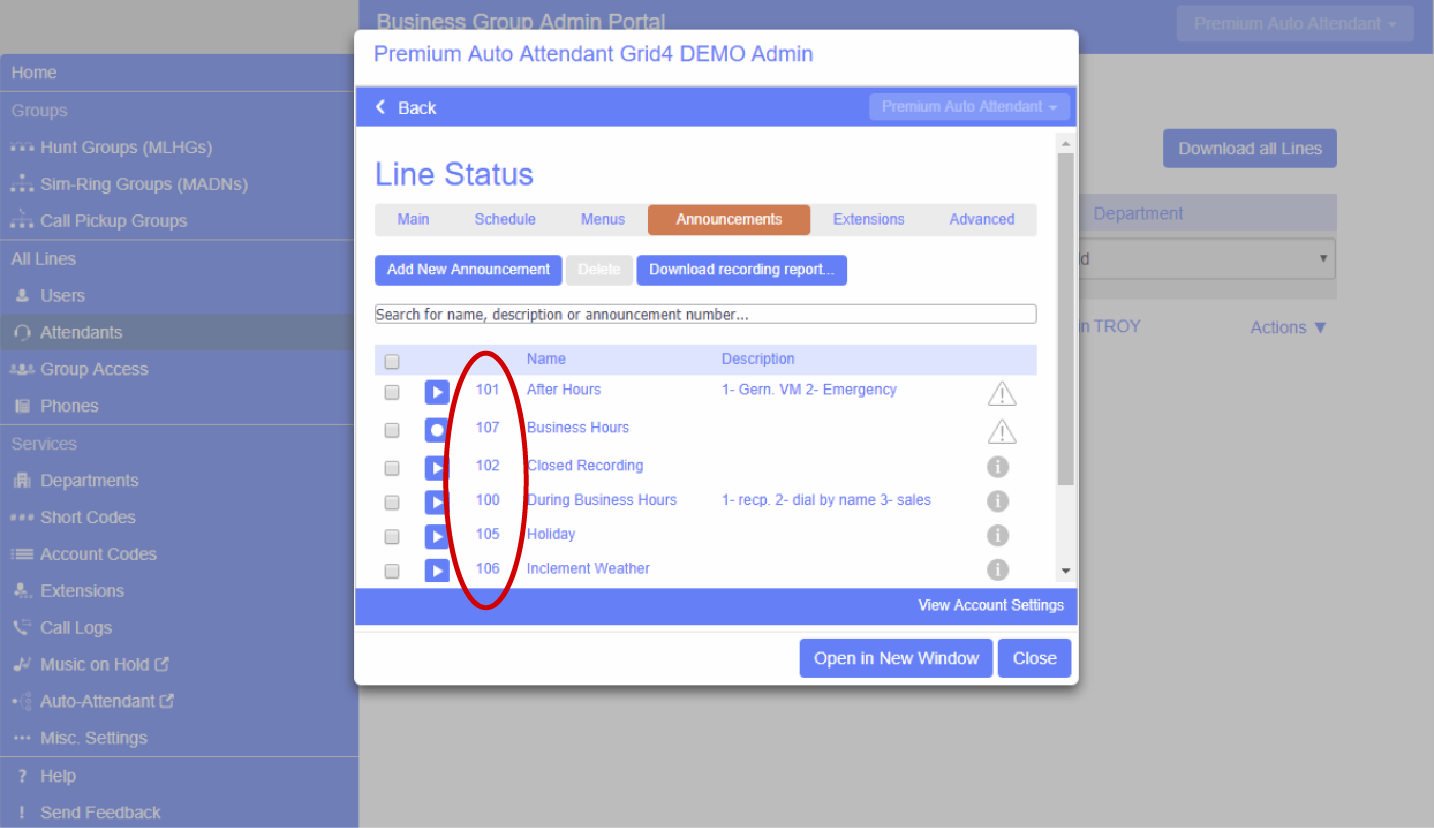
Go to “Announcements” and then “Add New Announcement”.
Name it “Holiday”, “Thanksgiving”, etc.
Click apply to save the changes.
Do this for every new announcement.
The system will generate a new 3 digit announcement number that you will reference when you call in to record it.
Recording a New Announcement
Dial 248.556.7000 from any phone. Mobile phones have excellent audio quality for recording.
** Note: If you are recording an announcement from your desk phone
Press your voicemail key and listen for the prompt “to leave this mailbox and to log in as another subscriber press 7”. **
The account number is your Premium Attendant number followed by the pound sign.
Enter your PIN followed by the pound sign.
Choose option 1, “change the Premium Attendant configuration.”
Choose “edit your announcements,” press 2.
Enter the 3 digit announcement number that corresponds to the announcement you’re going to record.
Follow prompts to record & save your recording.
Set up a Holiday Menu
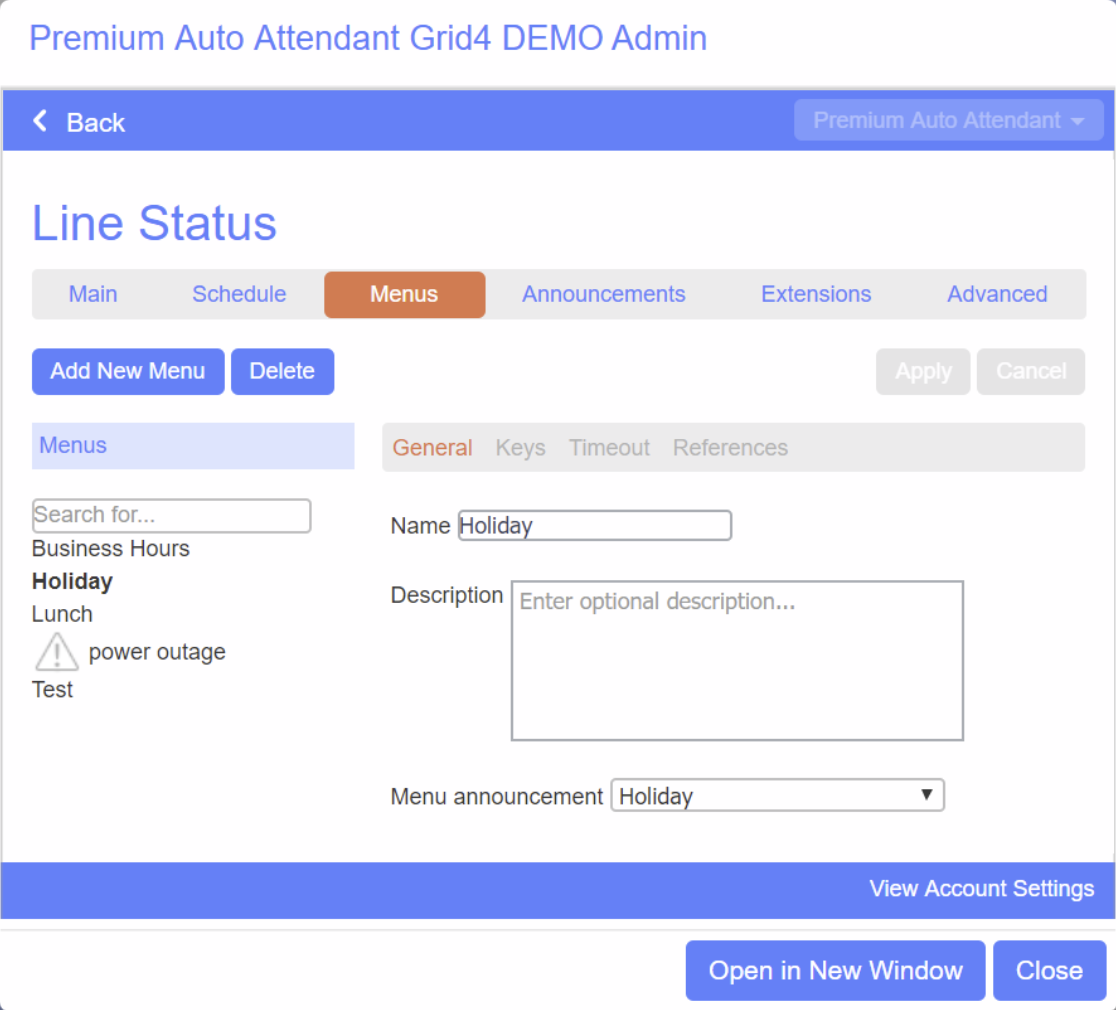
Go the “Menu” tab and “Add New Menu” with the same name as the announcement.
Make sure to use your new “Holiday” announcement for that menu.
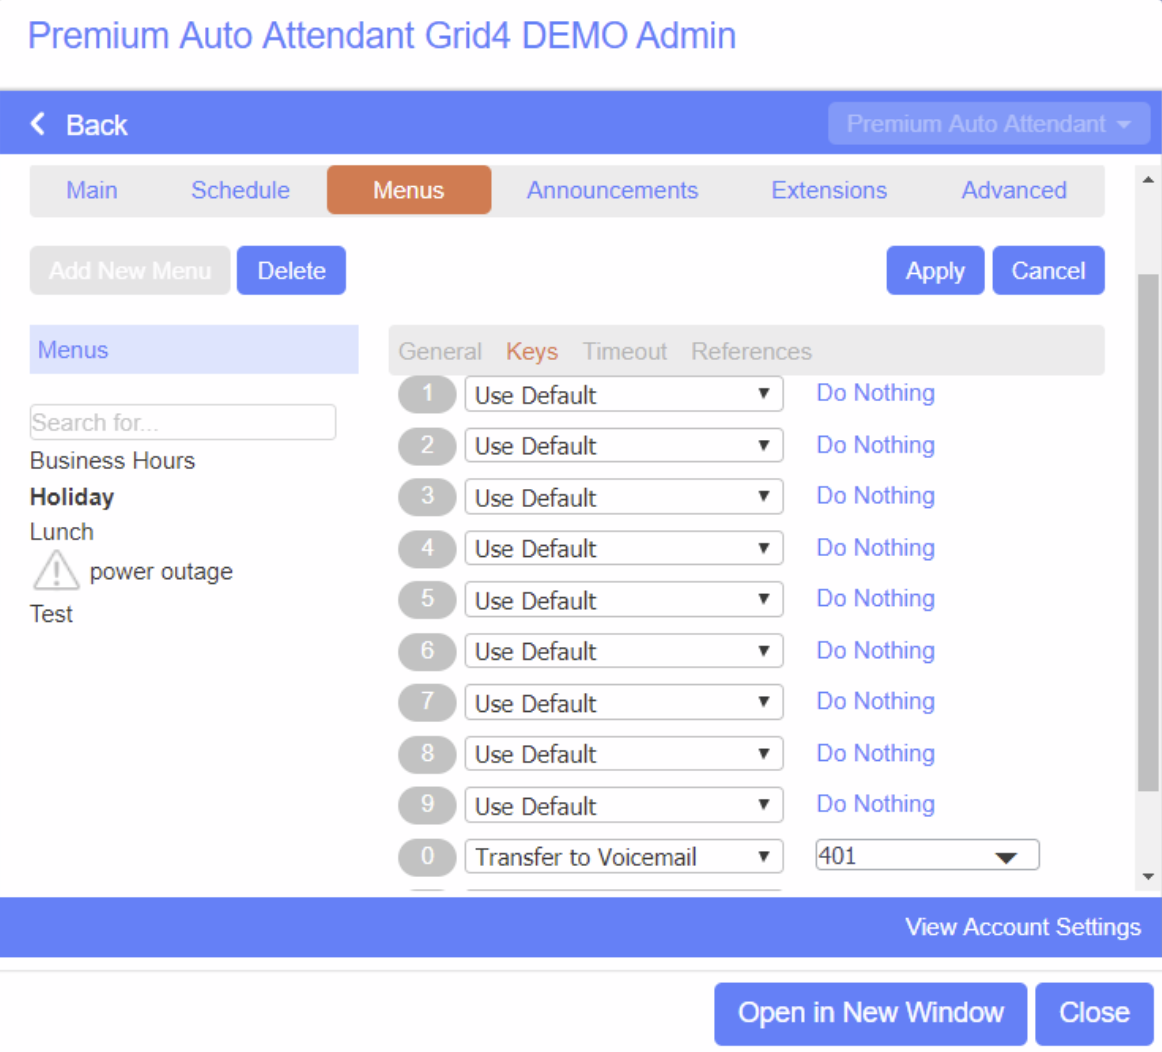
Program the menu keys to correspond with your announcement.
Click “Apply” to save the changes.
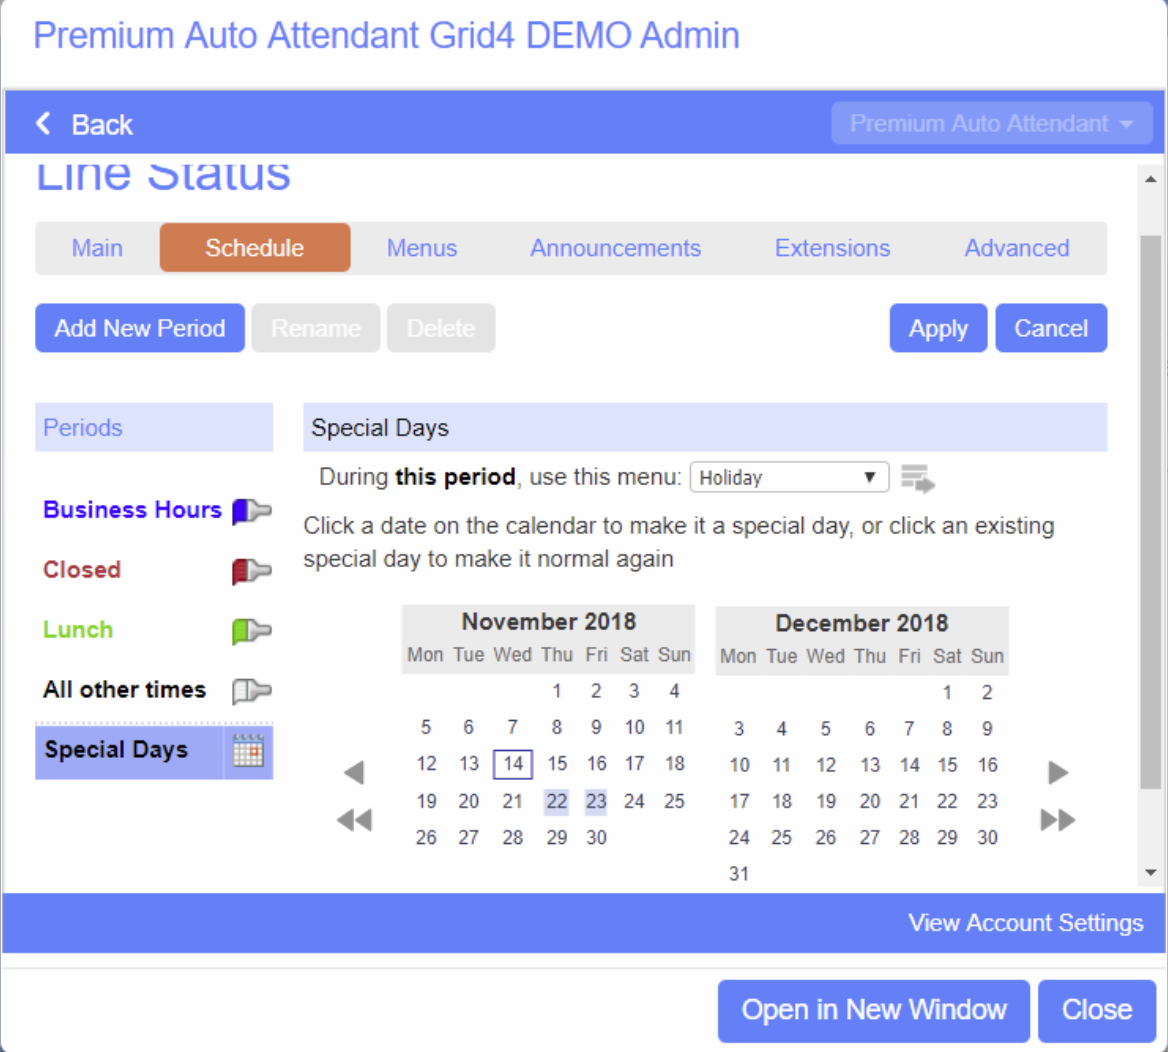
Holiday Schedule
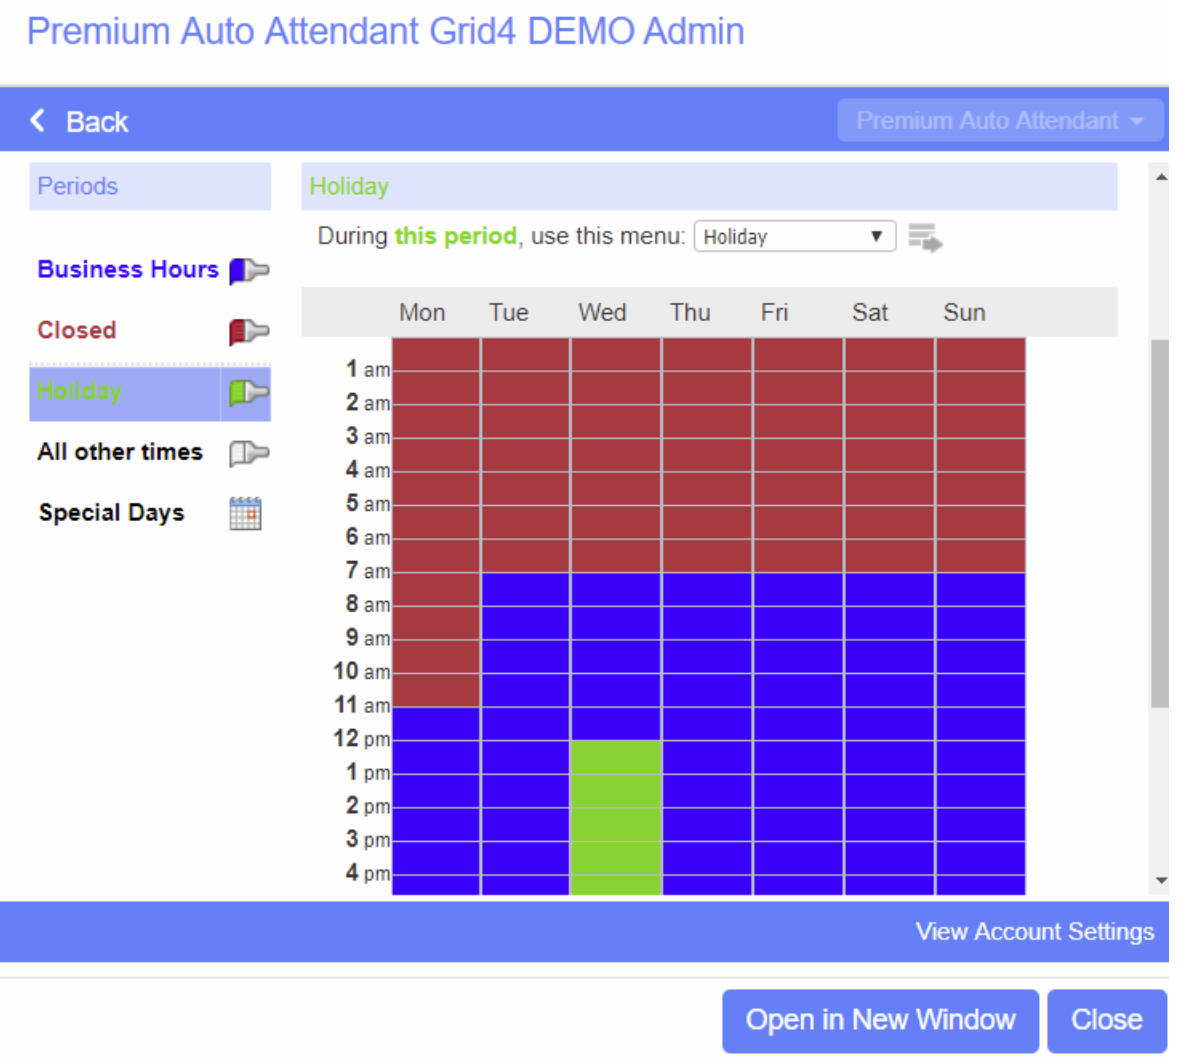
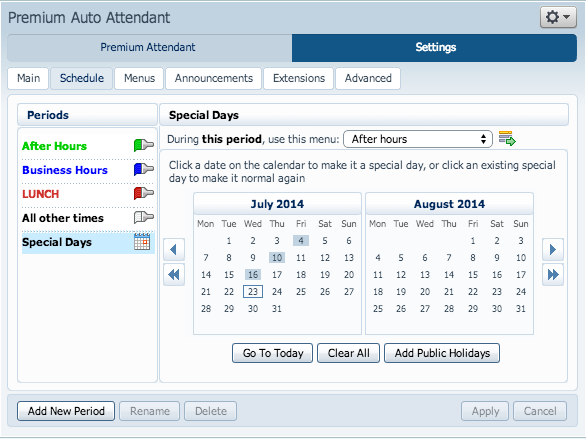
To apply the holiday announcement, use the “Special Day” time period in the “Schedule” tab.
Go to the “Menu” dropdown at the top of the schedule and choose the “Holiday” menu.
Click on the calendar day that you want your “Holiday” announcement and menu to play
Click “Apply” to save the changes.
This will override the normal schedule for the days that are highlighted. It will go back to the normal schedule on the next non-highlighted day. You may select all the days you want to follow the Holiday schedule by using the arrows to the right of the calendar.
PLEASE NOTE: The week begins with Monday for these calendars.
Half Days or Leaving Early – Option 1
For 1/2 days or days that you close early you can set a custom recording the same way.
Log into the Premium Attendant line.
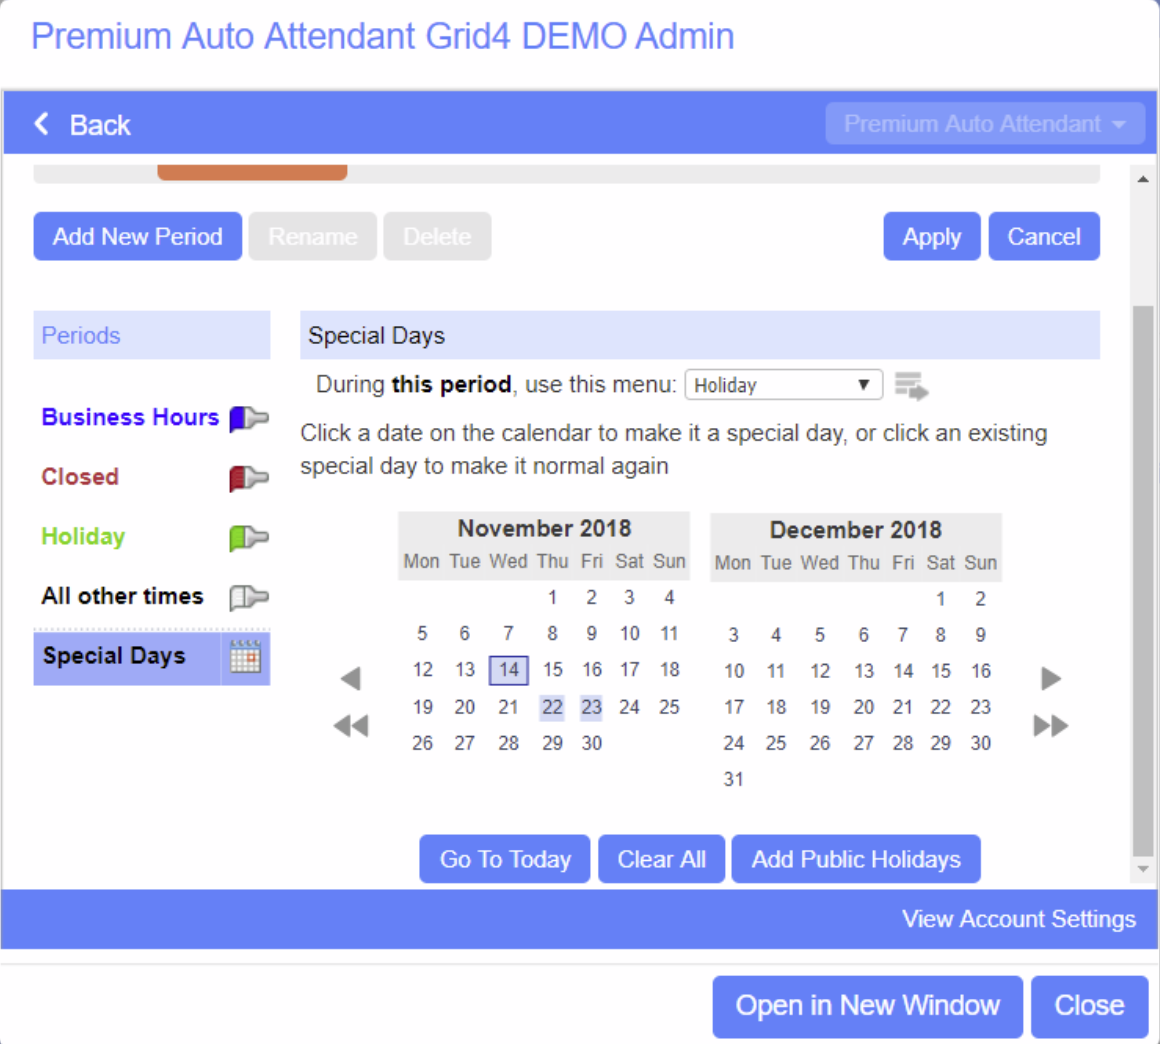
Go to the “Schedule” tab and choose “Special Days”.
Click on “Go To Today” and the “Holiday” menu and announcement will be immediately applied.
The schedule will go back to normal on the next non-highlighted day. You will not have to remove the holiday announcement.
Half Days or Leaving Early – Option 2
For 1/2 days or days that you close early you can set a Holiday schedule by coloring the grid in the regular schedule.
Log into the Premium Attendant line.
Create a Holiday time period.
Apply the Holiday Menu to the Holiday time period.
Color the grid in the appropriate day and hours that you will be closed.
PLEASE NOTE: This is the weekly schedule. You will need to change it back to the normal schedule before the same day in the following week or the Holiday schedule will still be in effect.
Auto-Attendant- Premium Attendant: Getting Started
Before you start to set up your Premium Attendant, it is a good idea to sketch out the operation of each menu on paper. This allows you to plan what options you need from the menu and how each one will operate.
For example, the main menu for a sales company may include the following options:
1. Have a schedule Attendant.
2. Provide a main menu for business hours that provides the companies default greeting and menu.
3. Have the ability to transfer to a sales menu that provides additional menu options
4. Transfer to speak with the Billing department.
5. Dial by name
6. Dial by extension
7. Transfer to an operator.
For out-of-hours and holiday operation, the Auto Attendant may provide an announcement that the store is closed (without allowing the caller to select any options), or it may provide an alternative set of menu options.
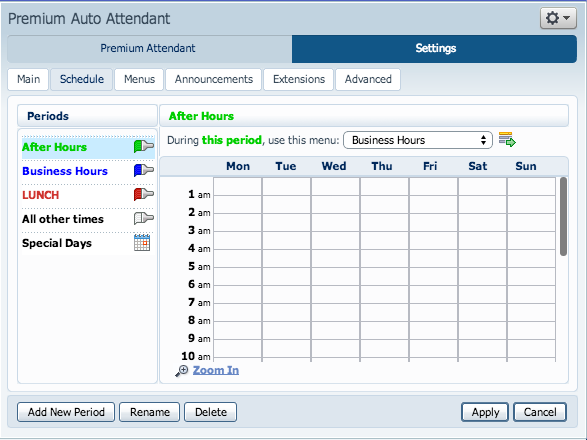
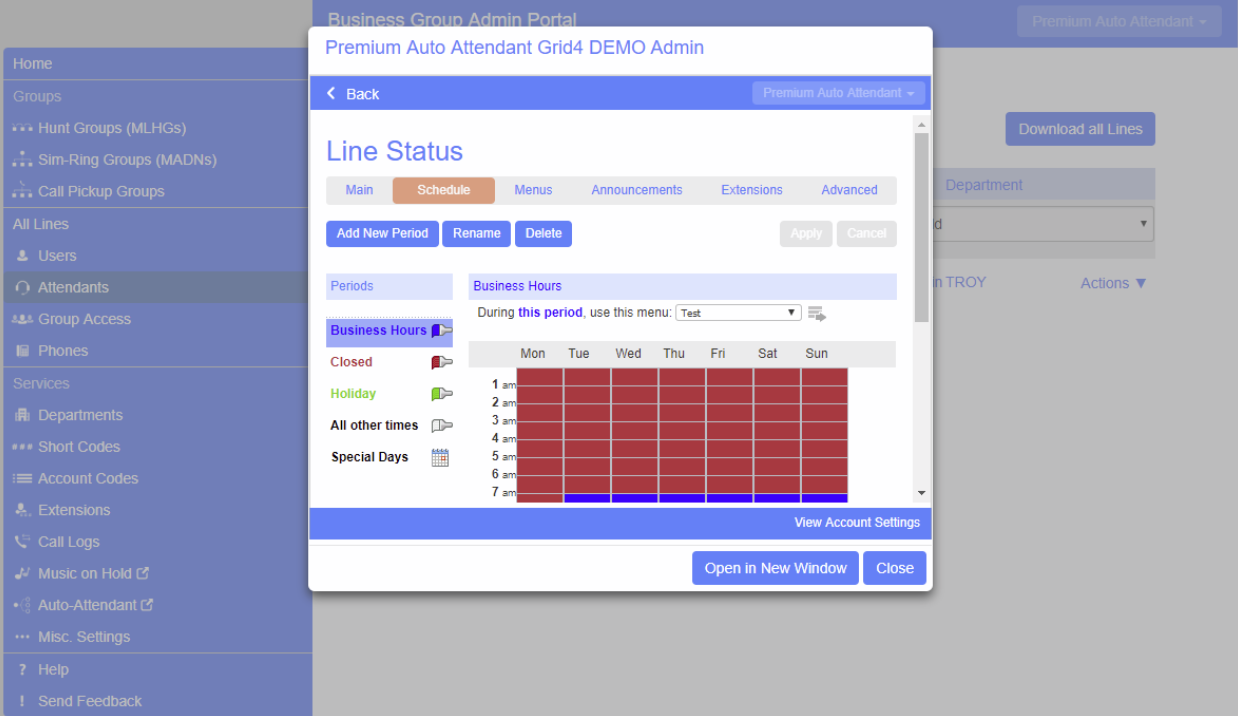
2. You may select to have different announcements play automatically depending on the time of the day or the day of the week. Configure your weekly schedule by clicking on the Schedule tab:
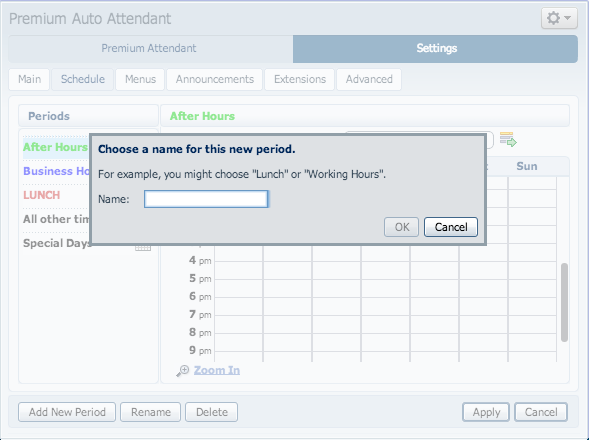
3. Once in the Schedule screen, click Add New Period in the bottom left hand corner to create a time of the day.
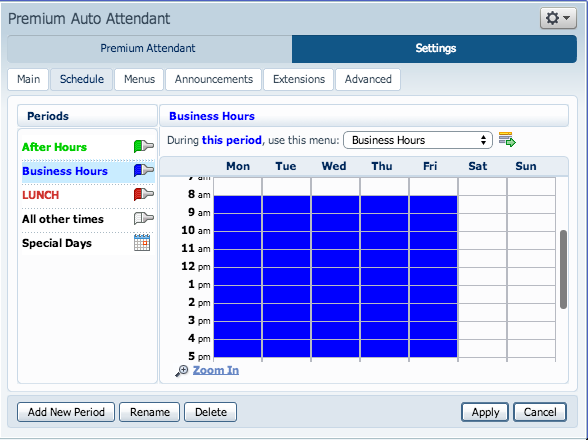
4. Click on the newly created period, (in our example, Business Hours) then click in the calendar and while holding down the left mouse button drag the mouse across the calendar to indicate the business hours. In the example below, the Business Hours are Monday – Friday from 8:00 am until 5:00 PM. Any other time are considered non-working hours.
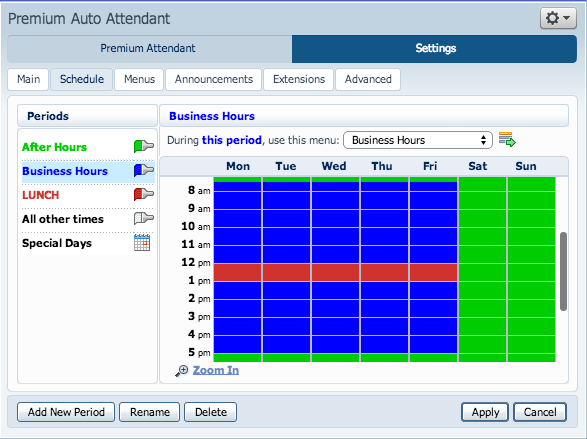
5. You may repeat these steps for non-business hours, weekends, lunch, etc.
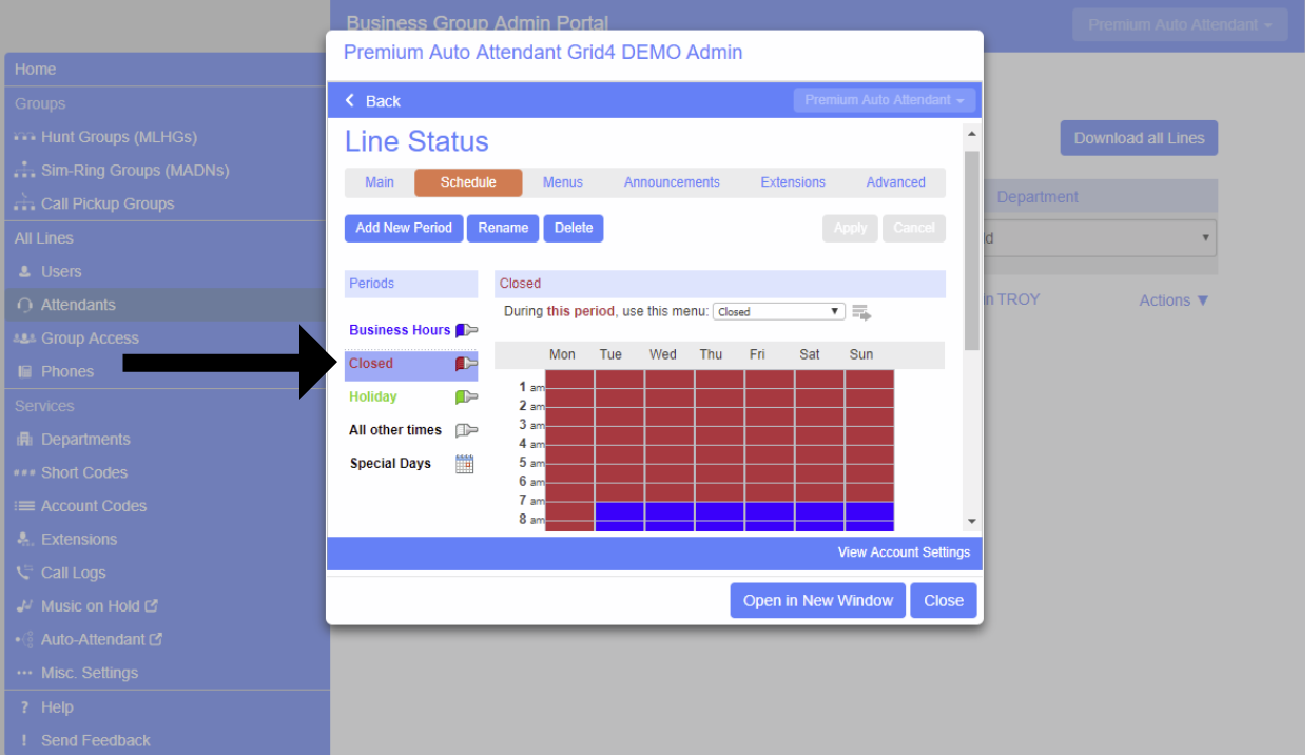
You may choose to have a different auto attendant for Holidays.
1. Click on Special Days in the left column titled “Periods”
2. You can choose individual days or choose the Add Public Holidays option to automatically add public holidays for your region.
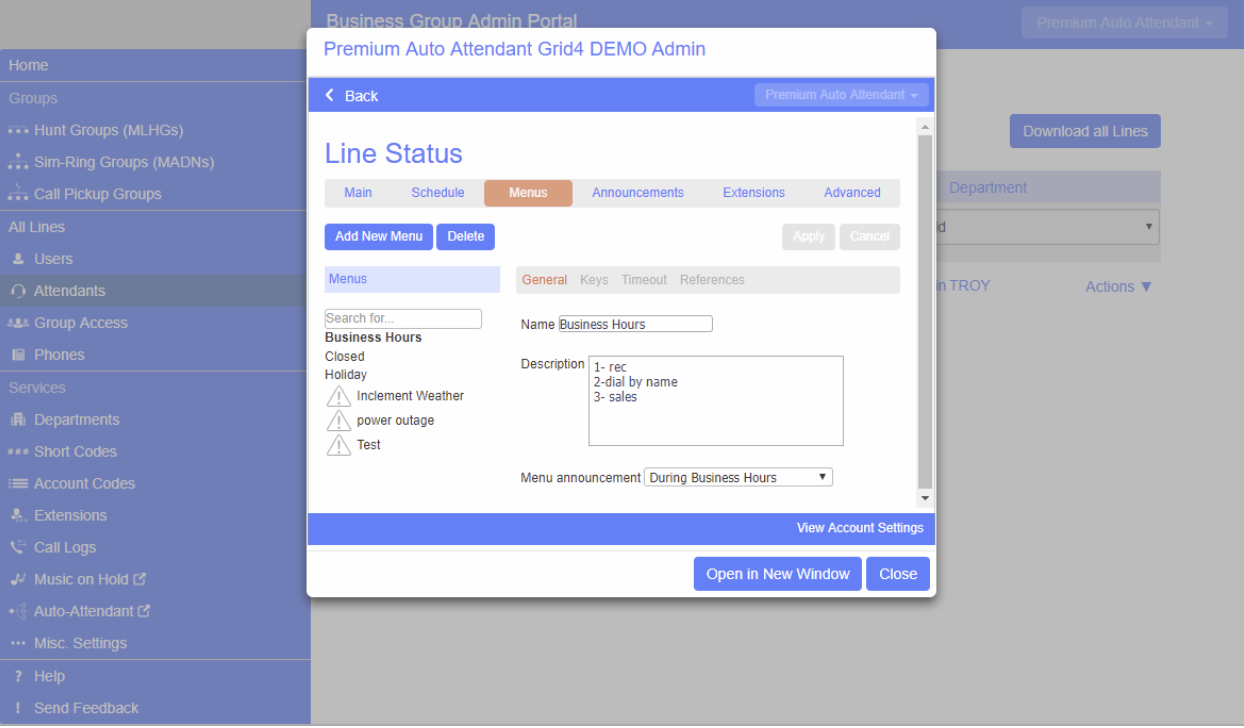
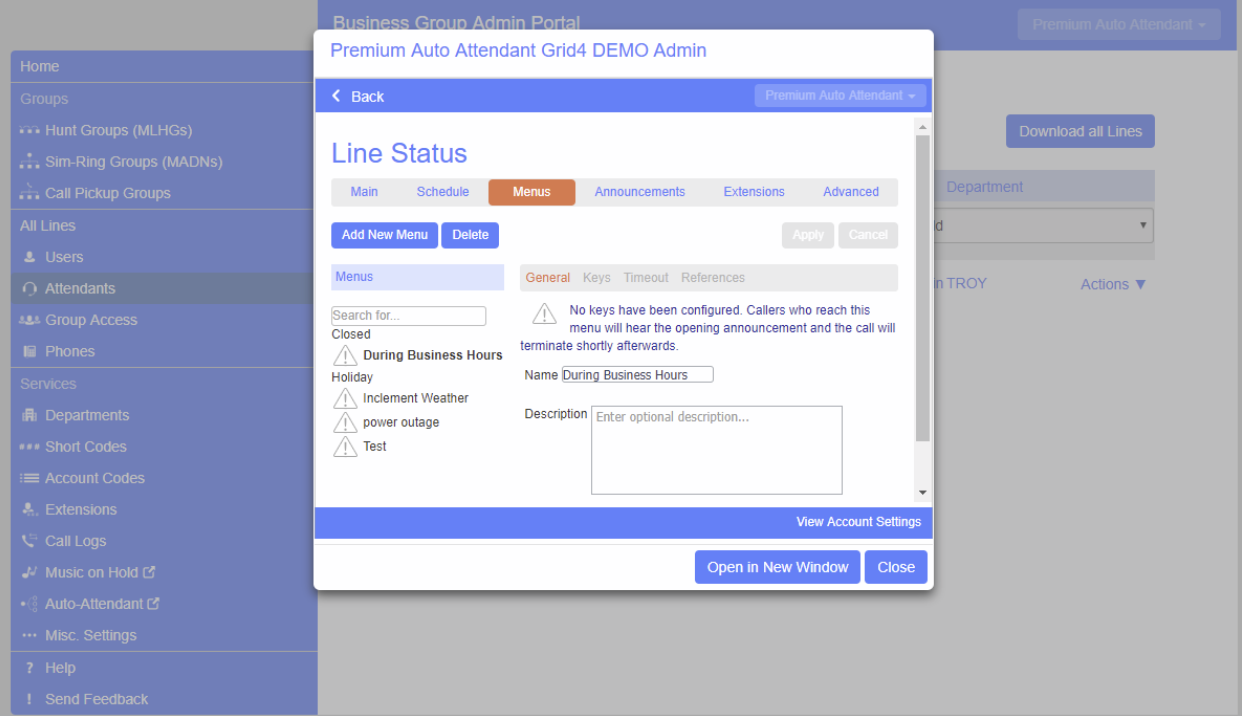
After Configuring Your Schedule, next you will need to set up your Premium Attendant Menu options. Click the Menus tab.
For each Period you have created in your Schedule, there should be a corresponding menu. To begin, click Add New Menu:
Begin to configure your menu by providing a name and description.
Enter a name and a description for reference.
Select Create New Announcement under the Menu announcement drop down menu. Click “Apply”
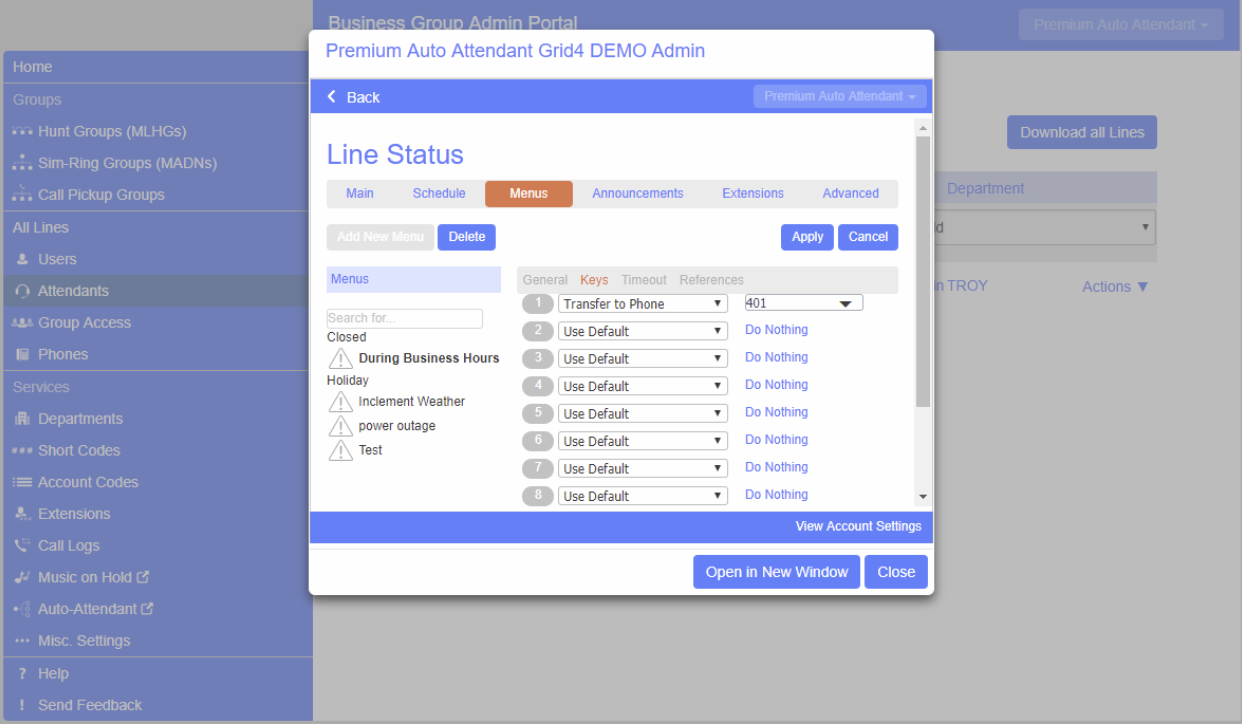
Select the Keys link to configure the key presses. Select an option using drop down menus for each key. Click “Apply”.
Choose from the following options:
Use Default (This option is default for all keys for new menus) • Transfer to Phone • Transfer to Voicemail • Dial by Extension • Dial by Name • Voicemail by Extension • Voicemail by Name • Transfer to Operator • Intercept Mailbox • Go to Menu • Return to Previous Menu • Replay Menu • Announcement – Return • Announcement – Hang up • Hang up
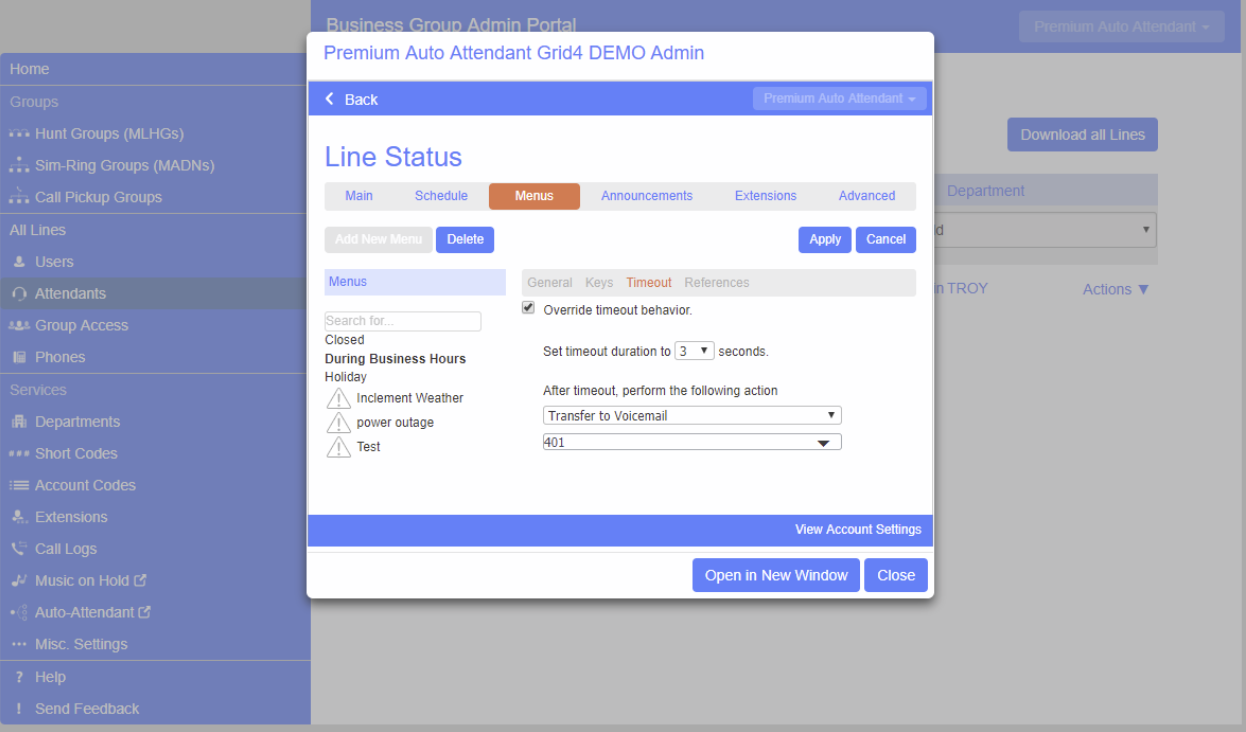
Configure the timeout option if desired. If a caller does not choose an option, the system will perform the chosen action. Enter the timeout duration and select an action from the drop down menu. Click “Apply”.
If no “Timeout” key is configured the default is to have the Announcement and Menu repeat 2 times, then the system will hang up.
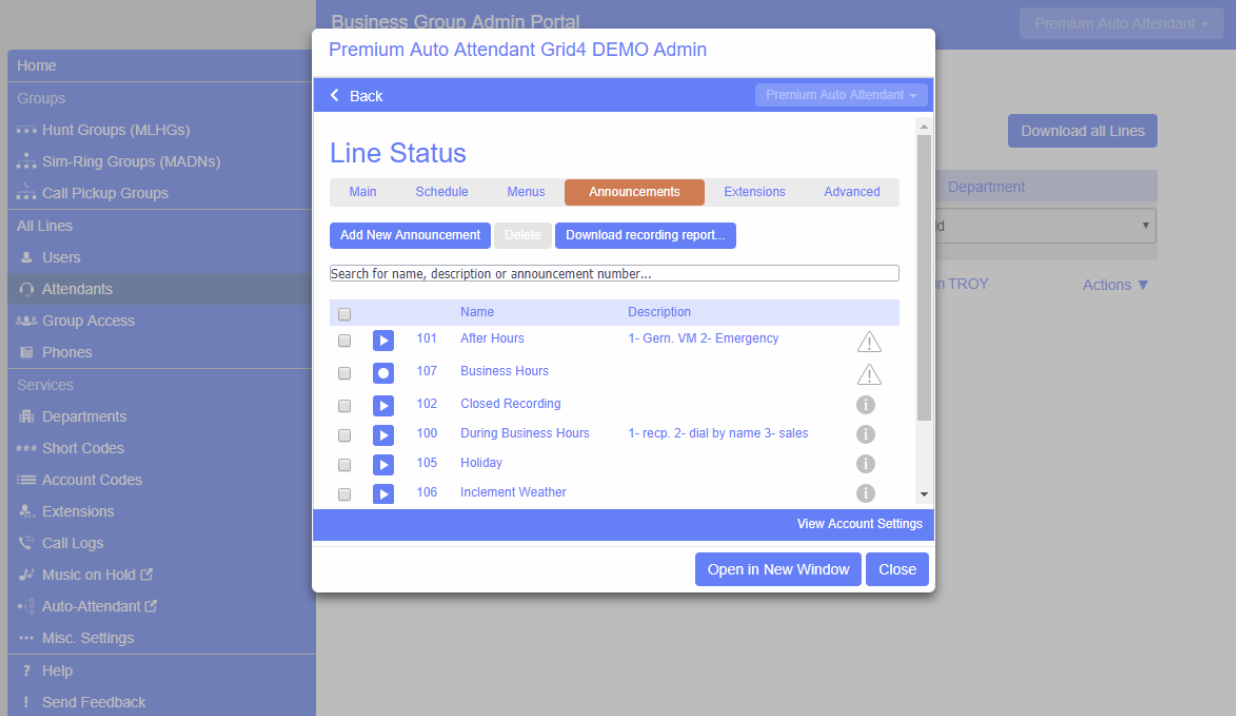
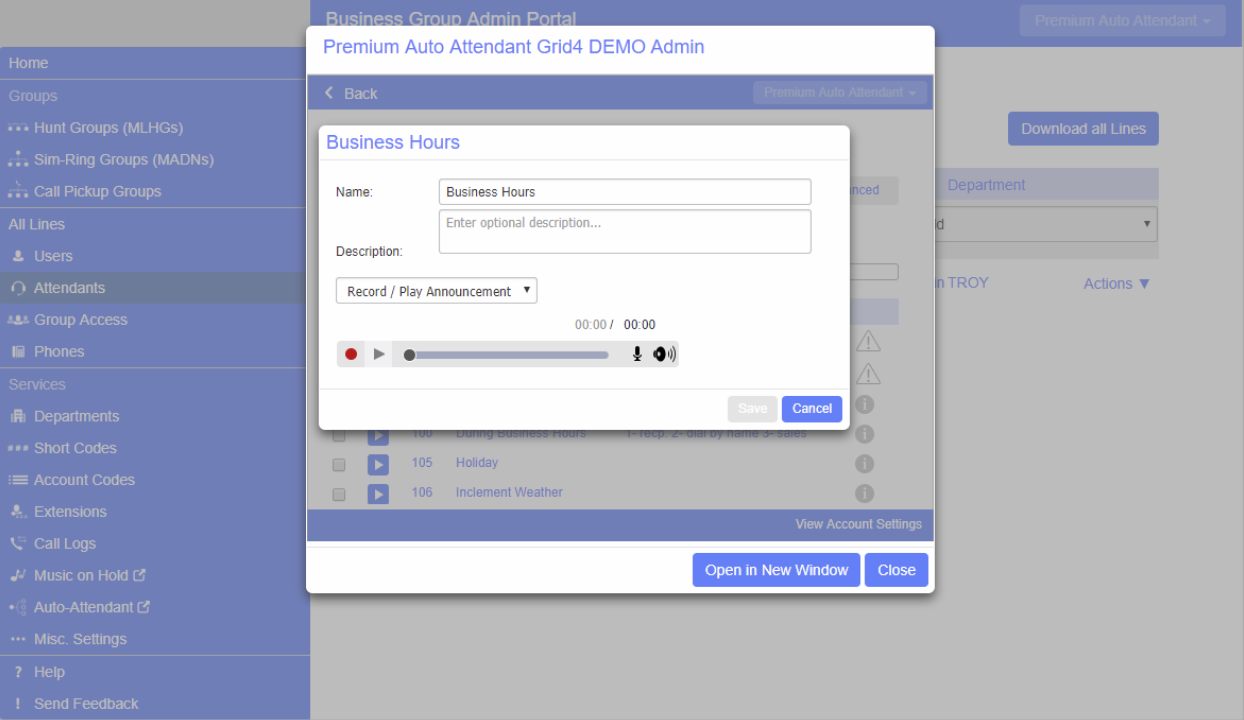
Click in the Announcements tab to begin configuration:
Click on the Announcement you would like to work on and the following dialogue will appear:
If you have an announcement pre-recorded, you upload your announcement and attach the file. This must be a .wav or .mp3 file.
If you do not have a file created, you may record your announcement through your premium attendant.
If you have a microphone or headset connected to your computer, press the red record button to start recording. When finished, press the stop button.
If you do not have a microphone or headset, you may call into the system to record your announcement.
Dial 248-556-7000
You will be asked to enter your area code and phone number. This is the number of the Premium Attendant that can be found in the Attendants page in the admin CommPortal.
Enter your pin for your Premium Attendant.
Press 1 to change the configuration of your Auto Attendant and follow the prompts.
While you are in recording platform, it will ask you for an Announcement ID. This can be found next to the Announcement name:
Repeat these steps until you have recorded all of your announcements.
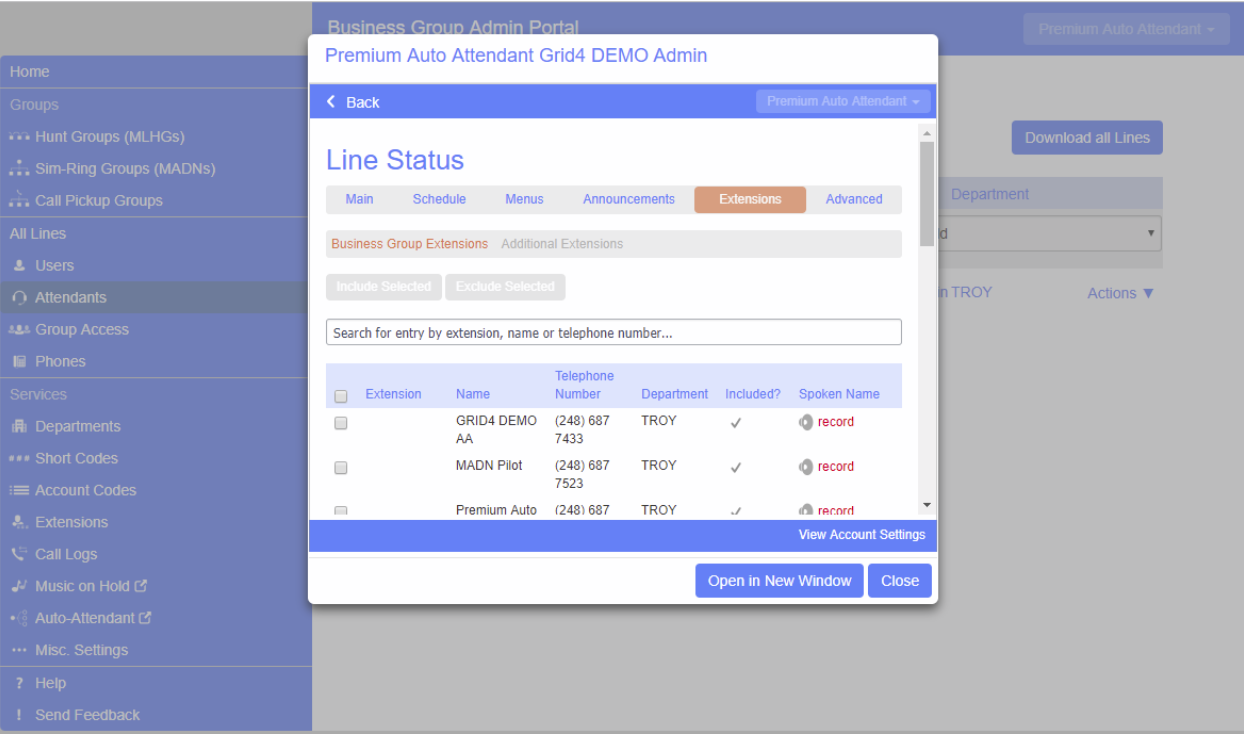
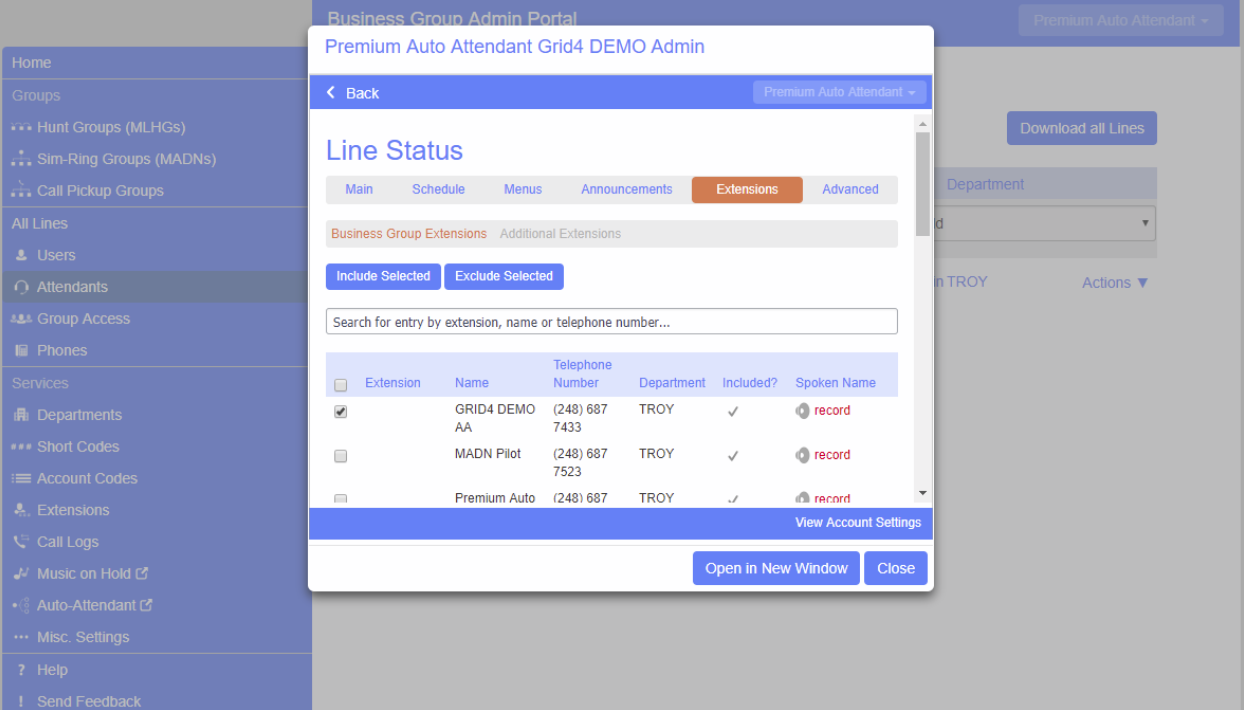
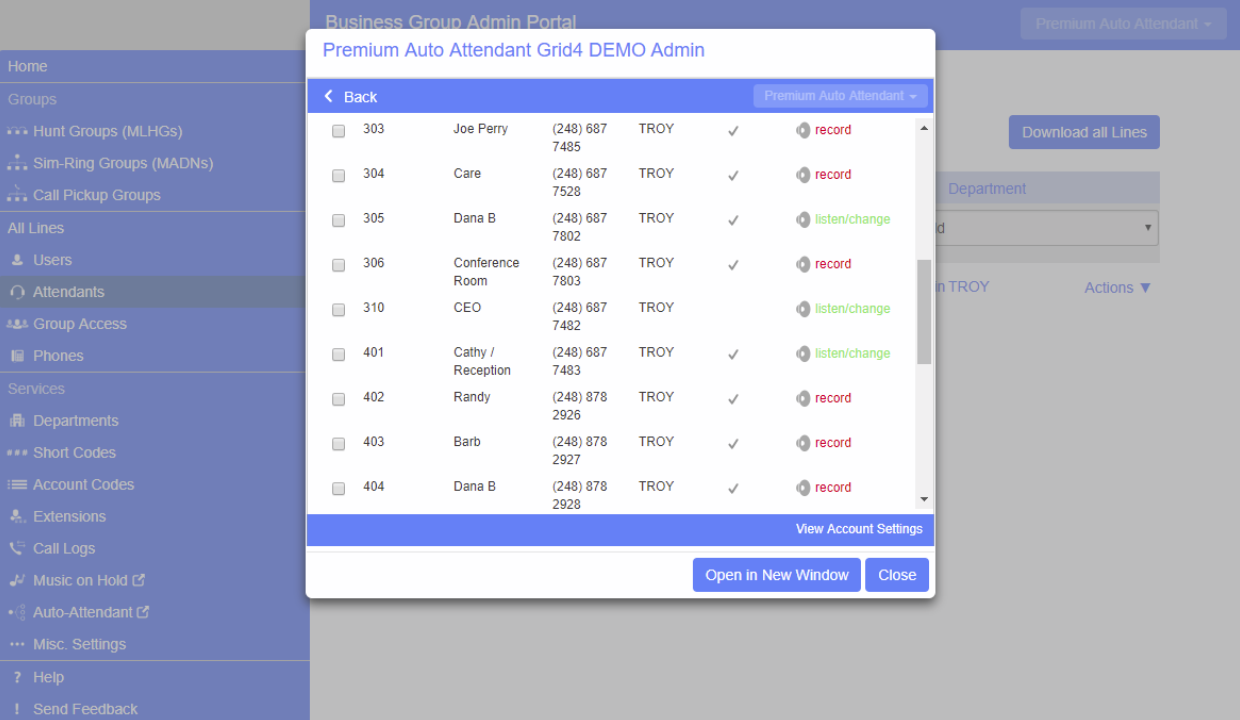
If you plan on using dial by name or dial by extension, you will need to select the Extensions tab and record a name for the dial by name.
Click the Extensionstab. Select the extensions you wish to be added or excluded for the dial by name or extension directory. Click either the Mark as Included or Mark as Excluded buttons.
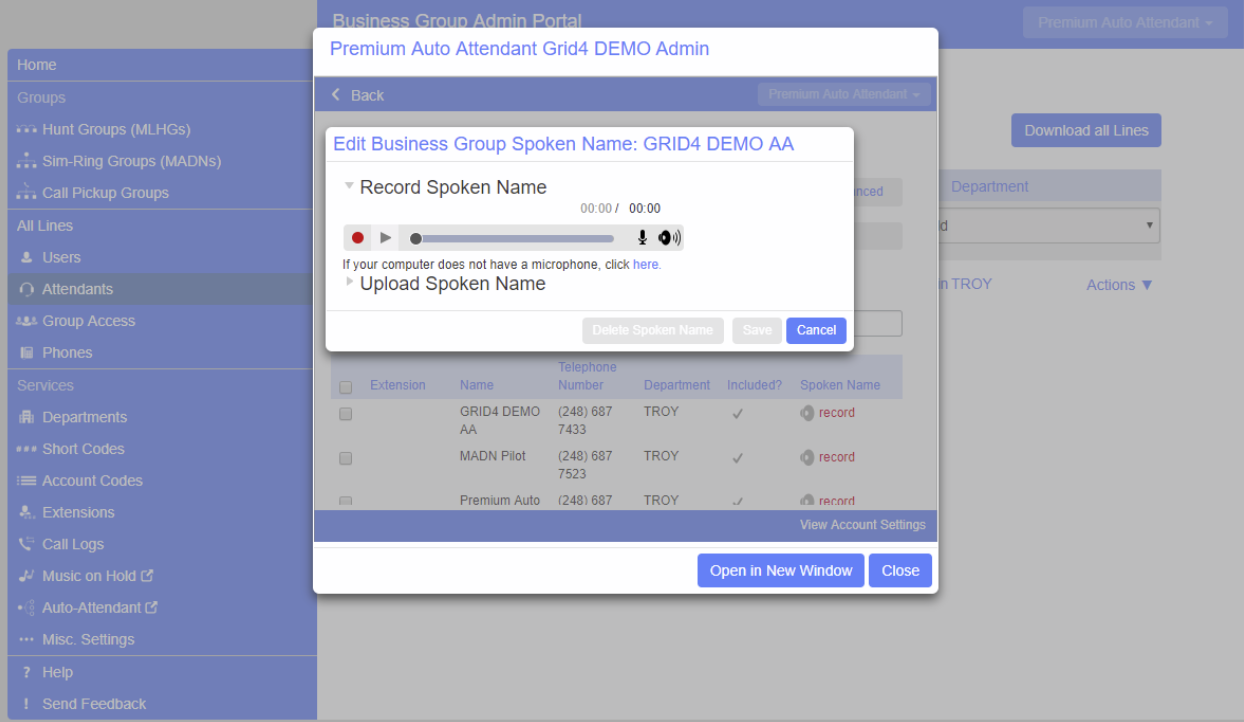
Click the record or listen/change icon to record the names.
Click the record or listen/change icon to record the names.
If you have the name pre-recorded, you upload your announcement and attach the file. This must be a .wav or .mp3 file.
If you have a microphone or headset connected to your computer, press the red record button to start recording. When finished, press the stop button.
If you do not have a microphone or headset, you may call into the system to record your announcement.
Dial 248-556-7000, use your Premium Attendant number and PIN. Follow the prompts to record extension names.
To assign a Schedule to a Menu, follow the below steps:
Click on the Schedule tab
Find the line “During this period, use this menu:” and use the drop down to choose a menu to match up with this period of the day (Note: it’s helpful to have the same names for your Schedule and Menu to match them):
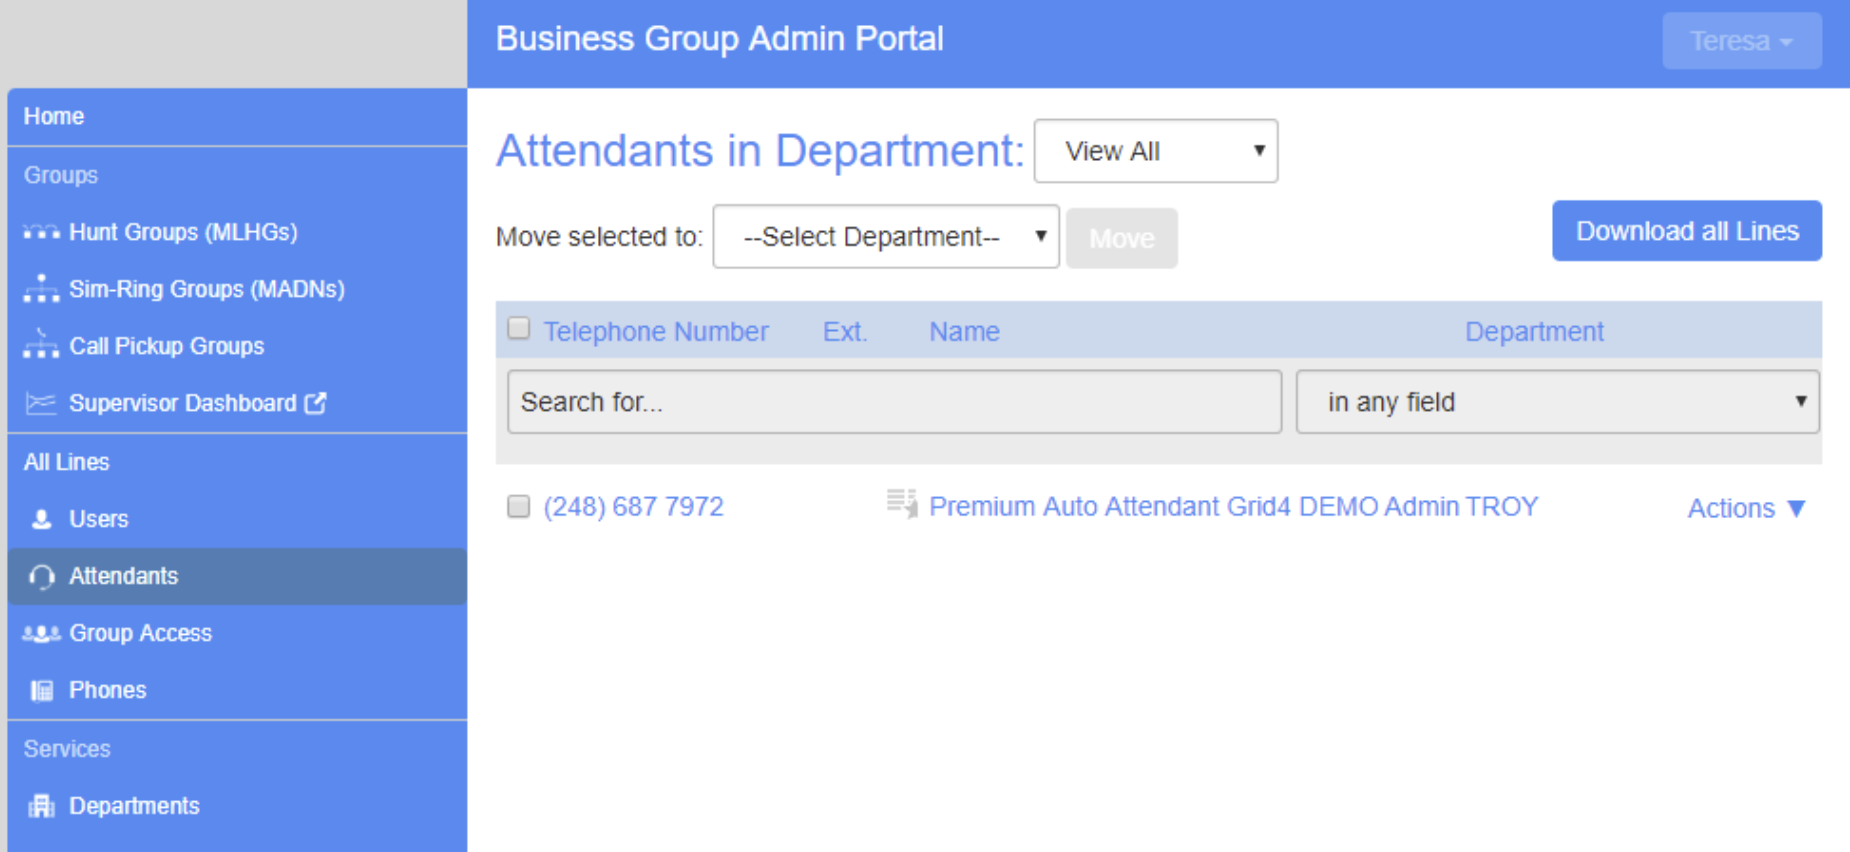
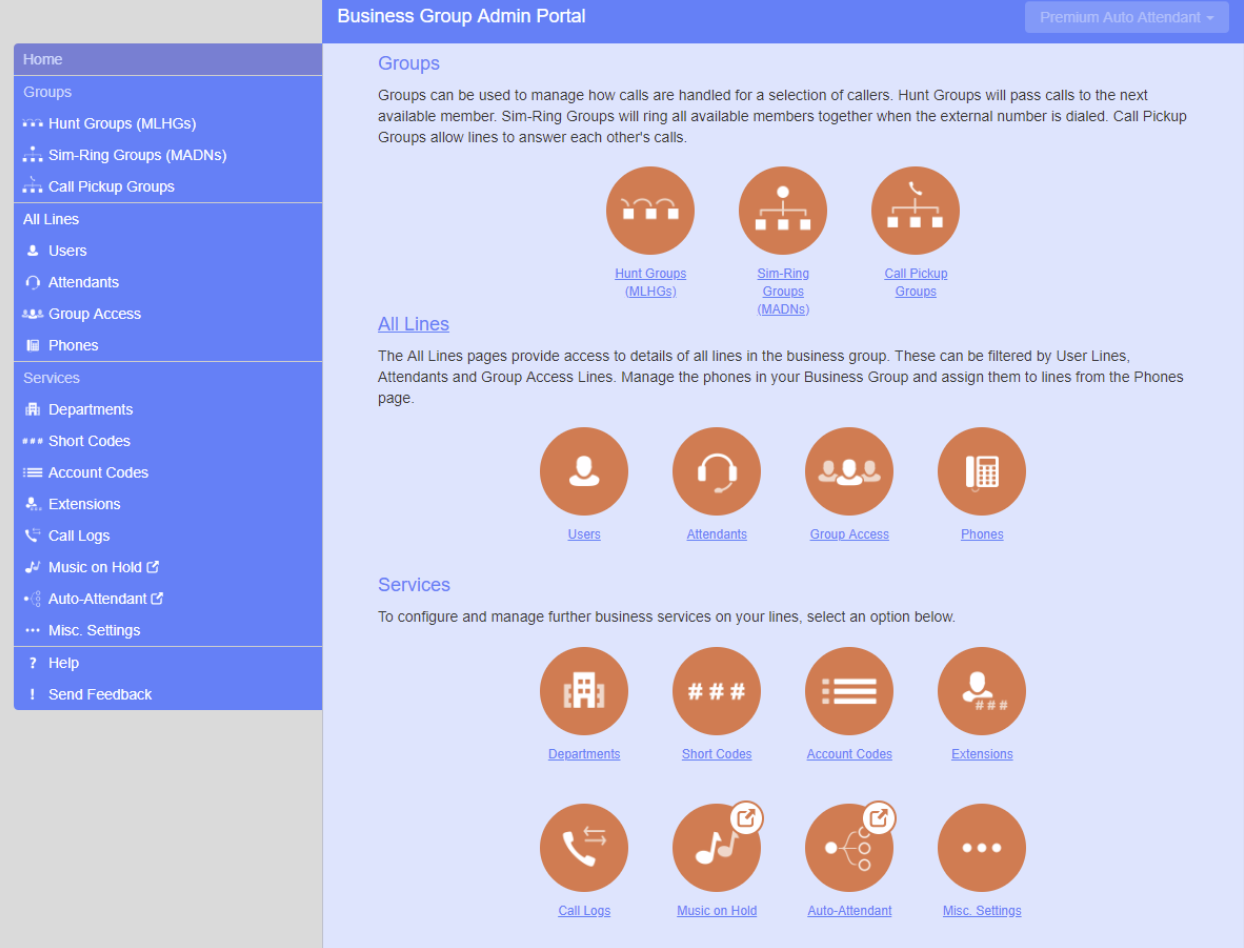
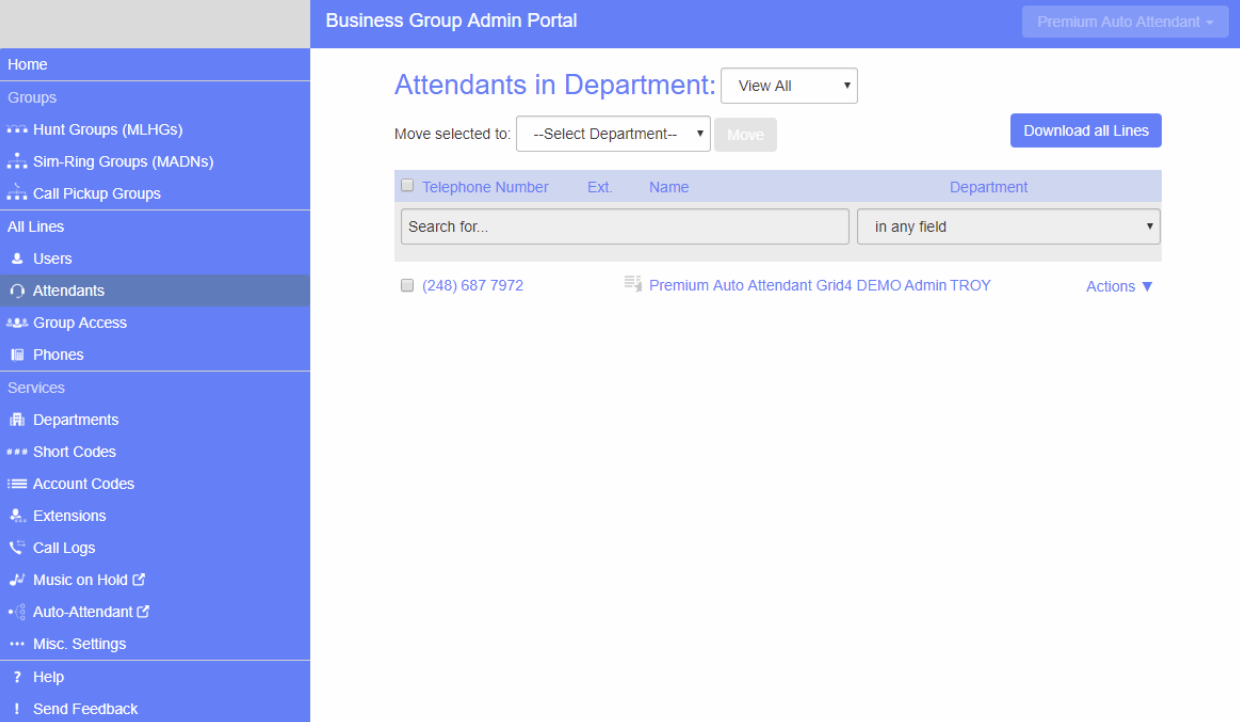
Click on “Attendants” using the link on the panel on the left or the orange circle under “All Lines”
Click on the “Actions” key
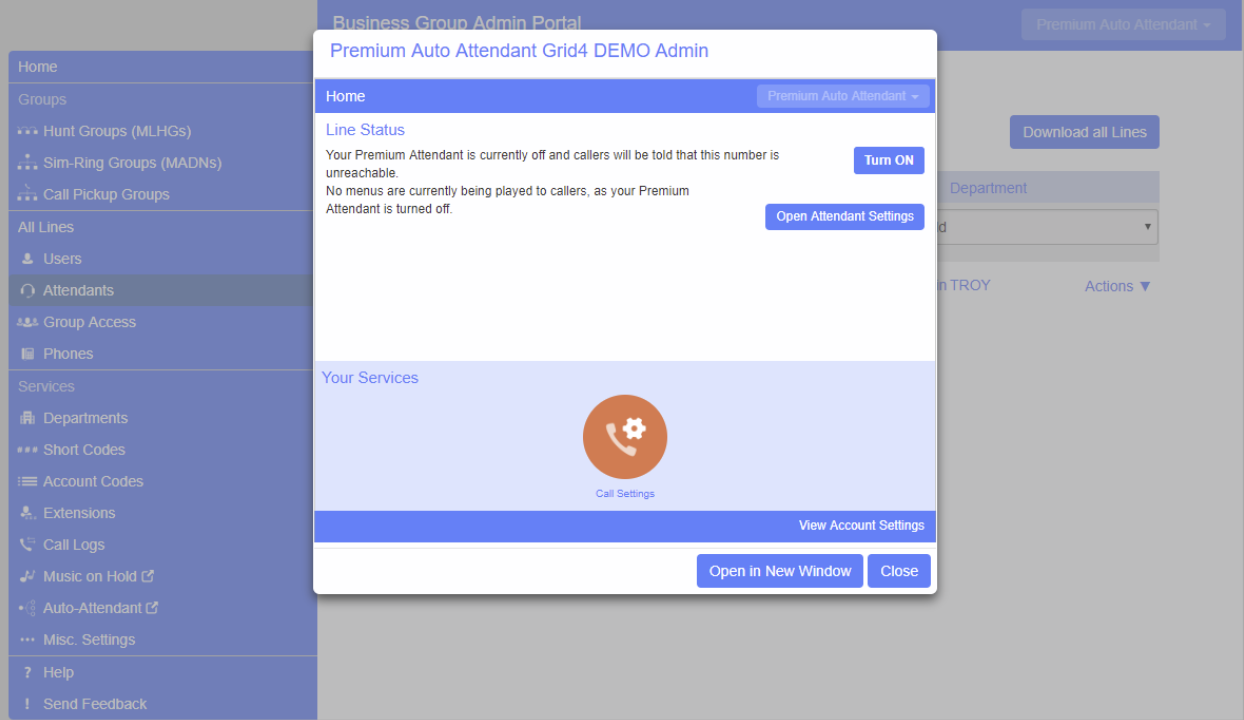
Then click on “View Attendant Settings”
All Menus, periods, and announcements must be linked together before the premium attendant can be turned on.
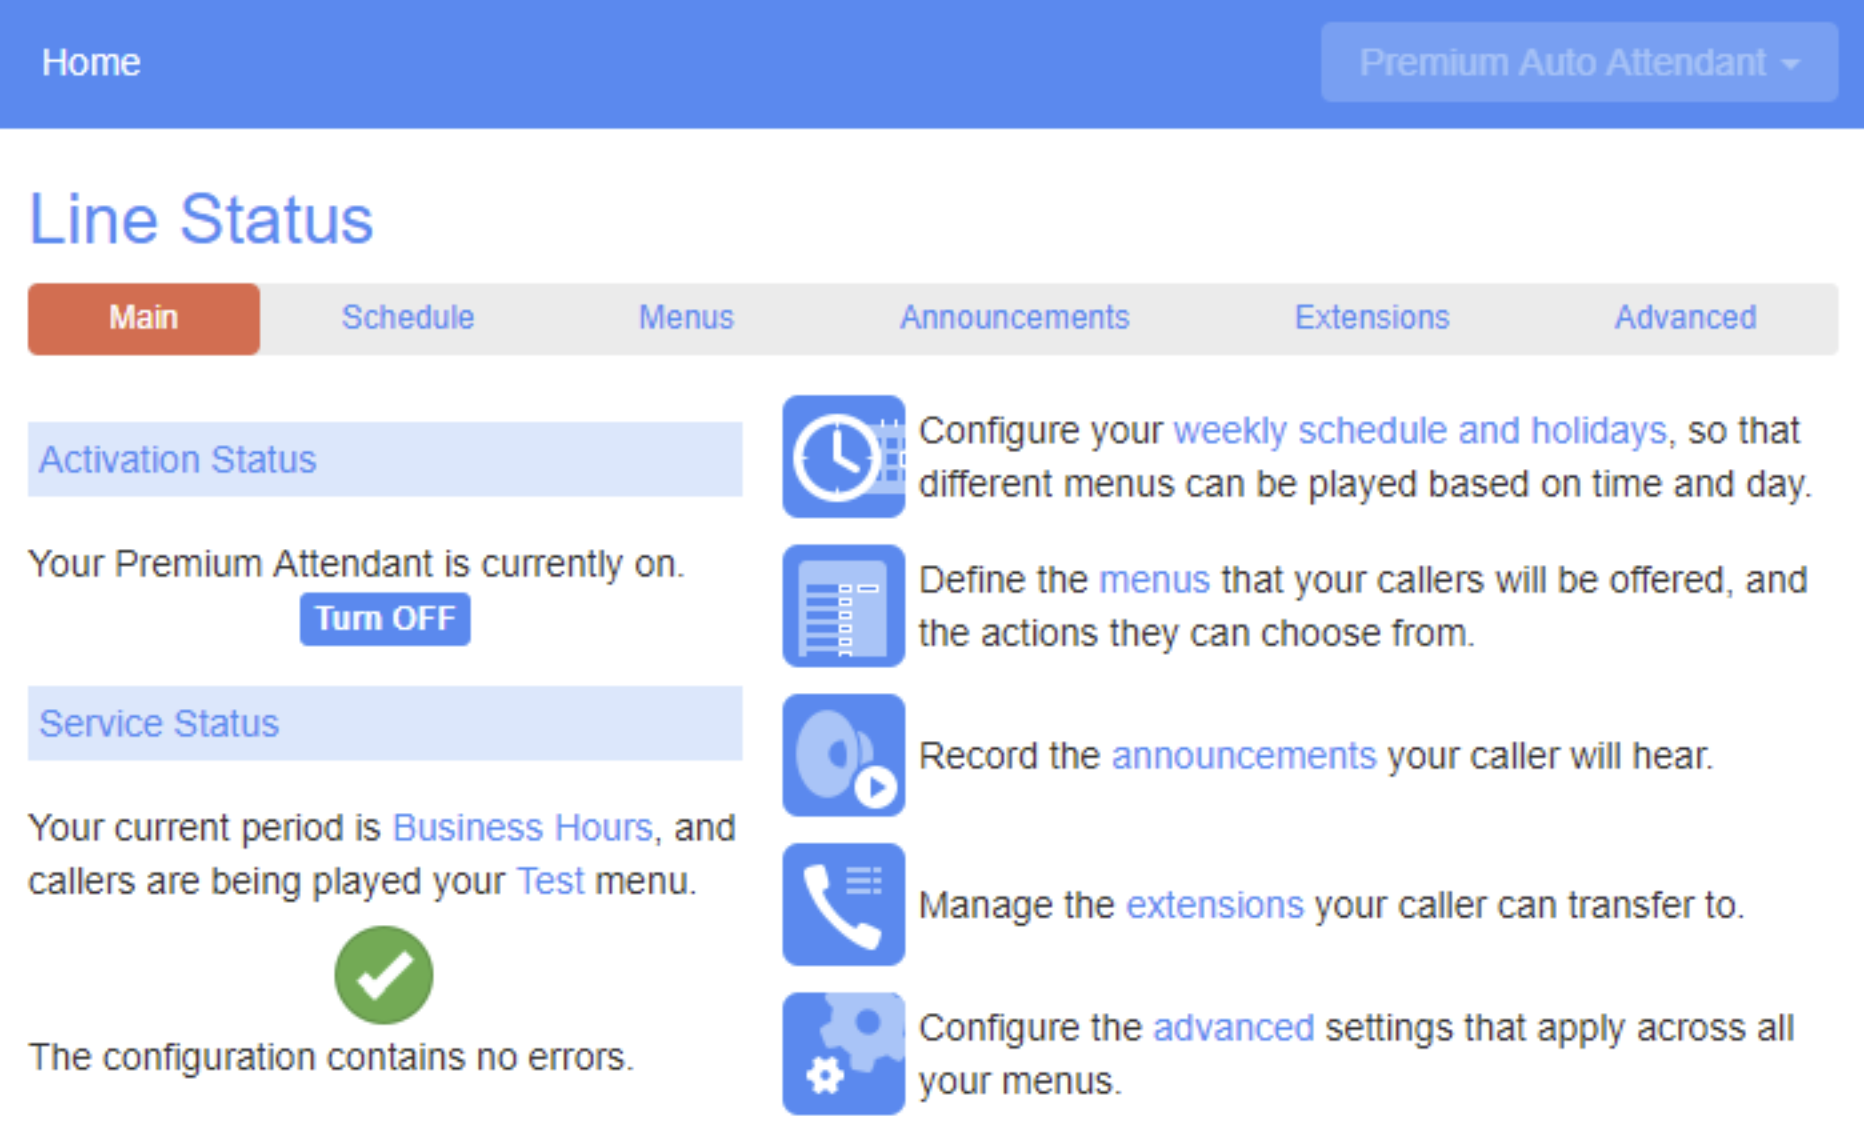
The Main tab has a Service Status panel that states your current schedule period and the menu that callers will hear. It also reports if you have errors in any menus, or one or more announcements is missing audio.
The Schedule and Menus pages use a banner line to report any errors.
The following icons are used to indicate incorrect or incomplete configuration • error icon • warning icon
If there are any errors in your configuration, you will be warned against turning on Premium Attendant, and in some cases this will be prohibited.
Click “Turn On”
The picture below demonstrates when the PremiumAttendant is on and all configurations are accepted.